Showing posts with label glue. Show all posts

Friday, March 2, 2012

A little bit more T5

Well, you knew I wouldn't be able to leave this alone!

First, the dress from cardstock ((#9), napkin (#25) and ribbon (#18).

I started with the dress shape cut from cardstock and a piece of the top ply of the napkin.


The piece of napkin is wrapped around the front of the dress shape and glued to the edges of the back.
 The bottom edge of the napkin is glued in five spots along the bottom of the dress shape.

The napkin is gathered at the waist and a piece of ribbon wrapped across the front and the ends glued to the back.
 The top of the napkin is shaped across the bodice and folded to the back
 then the back piece is trimmed so it folds over the back about 1/4" then it's glued to the back.

I've glued ribbon to the back to form straps.
 And here's the dress:

Now for the hat. On the computer I made two pattern pieces: one .8” diameter circle and one strip 2.9” x .3”, printed them out and used them to cut the pieces from a piece of felt.


Spread glue around the edge of the felt circle
 then add the strip of felt around the circle and join the ends of the strip with glue.

Where the strip met, I added some feather pieces. I then cut a narrow (about 1/8" wide) strip of the napkin and spread glue along the length of the wrong side then wrapped it around the lower edge of the hat.

 Finished hat:

I knew that I wanted to use the tea leaves from the tea bag (#21) as dirt in a plant pot (#10) but didn't really see anything on the list to make a plant from.

But I had taken out green silk (as #22 - piece of green fabric) and it caught my eye. So I cut out a small piece of it and decided to experiment.

I coated the entire piece of silk with Weldbond glue
and let it dry. Absolutely love the effect!
 I cut a bunch of leaves from the glue-covered silk and shaped them with my fingers. They look SO good! (If I do say so myself VBG)

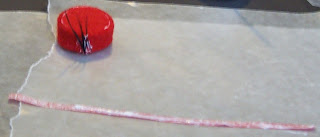
I had this blue bottle cap but didn't care for the colour for a plant pot. (Normally I love the colour.)
 So I've covered it with a generous coating of gesso and I'll paint it terra cotta when the gesso is dry. For this I wanted a rough finish so didn't smooth the gesso.

I'll let it dry overnight then try to arrange my leaves in it.

Saturday, November 26, 2011

Loveseat

I've had this in my mind for quite some time and finally decided to try it out for my young miniaturist friend.

Soft sponge 4 1/2" x 2 3/4" x 1 1/2" (8 for $1 at Dollarama)
2 3/4" foam hair curlers (pack of 8 for $1 at Dollarama)
piece of matboard 10 1/4" x 2 3/4"

Score and fold the matboard in 2 3/4" from each end.

Remove the plastic piece from the inside of the foam curler and slit the foam lengthwise.


Wrap the matboard around three sides of the sponge and slip the split foam rollers as shown. I'm going to cover the foam so I'm just holding it in place right now.

I have a suede look shirt that I picked up at Frenchie's in Nova Scotia that will be used to upholster the foam.

I cut a piece of fabric to cover the sponge. Not the best choice of fabric. Between the sponge soaking up glue and the fabric being a polyester blend, you really have to be patient and glue one part at a time then wait for it to dry before proceeding to the next step.

I wrapped the fabric around the sponge overlapping it at the back. I only glued the back pieces - not the bottom, top or front. Once that glue dried, I trimmed the ends a bit and glued the fabric to the ends of the sponge. I then glued the entire seat in position on the matboard and placed it in my gluing jig with a book against the open end to hold everything in place until the glue dried.


Boy, if I thought gluing that fabric in place was hard, it was nothing compared to trying to glue it to the foam rolls. I cut it to cover the outside with just enough to cover the slits on either side. I wrapped the fabric around the piece, gluing the ends into the slits and sliding a popsicle stick in the slit to hold the fabric in place while the glue dried.

Then I cut slits all around the ends, spread them quite liberally with glue, and tucked each piece into the middle of the roll.


When I put the arms back on, I felt they were too high so I cut the matboard down by 1/2" - which was probably a bit too much.

Not thrilled with it but it was a fun experiment.

drawer for the Michael's hutch

Sorry it took so long to get back to this but RL is getting in the way (big time) of minis. LOL

Yesterday, four of us took the "Homes for the Holidays" Christmas house tour in Edmonton then went out for dinner. When I got home there had been a problem with the condo guest suite that I look after renting out and had to deal with that.

My work room is such a mess that it has to be cleaned (or at least tidied) before I do anything more (can't find a thing), paperwork has fallen behind and I've undertaken the most fun project for a young miniaturist so the blog may be a bit neglected in the next couple days.

Anyway, on to the drawer.....

You'll remember that when I took the hutch apart to stain it, I also removed the false drawer front from the bottom of it.

It has been sanded and stained.

I measured the bottom of the drawer opening. I subtracted the thickness of the drawer front from the depth and cut the drawer bottom. the drawer back was cut the same length as the bottom. It's not quite as high as the opening as I don't want it to fit too tightly. The end pieces are cut to fit between the drawer front and the back.


Left: drawer front
Centre: drawer side, drawer bottom, drawer side
Right: drawer back
 Using wood glue, the bottom of the drawer is glued to the drawer front. Lego blocks hold the wood in position while the glue dries.

The sides are glued on top of the drawer bottom and to the drawer front.

The drawer back is glued to the bottom and against the sides.

I didn't fill the drawer/door pull holes before staining because I have some beads I plan on using for pulls.


The tool is a Xuron sprue cutter that I got at Hobby Wholesale in Edmonton. It's a modelling railroading tool and makes great flush cuts. The beads are a string of Christmas trim.


Sorry, between the size and the sparkle, couldn't get a very good picture. The round faceted bead will be the pull and there's a small section sticking out that, when filed down, will fit in the holes.

And here's the finished cabinet:


The wood doesn't take stain very well and the grain is too large for scale which is one reason I prefer to do them with black or red markers.