Showing posts with label gesso. Show all posts

Saturday, March 3, 2012

T5 final pieces

Last night after I blogged, I was looking through my beads and came across a leaf bead so while the gesso was still wet I added the bead to the front of the plant pot. This morning I painted the pot terra cotta and the bead green.

Here a tea leaf/glue  mixture has been added to the plant pot.

I took about 3/4" from the end of a round toothpick and glued the plant leaves to it. When that glue was dried, I glued the end of the toothpick
and planted it in the pot.

Also last night I found this butterfly bead. The left hand side has been painted with the Sakura 3D glaze pens, the body with black marker, while the right hand side hasn't yet been recoloured.

I used a straight pin to add the completely painted butterfly to the plant pot.

I printed a label from the internet and wrapped it around two cotton balls for a package of quilt batting.

I stripped the four Q-tips of their cotton ends and painted them green with a marker.
 And used them to frame the mirror.


I heated the pin on a small push pin with a match and used pliers to remove it. Added a fingernail sticker to the push pin, added a bead for a light bulb and another bead for the shade.


 I cut the picture from this greeting card to add a window to the wall.


 Now I have to find something to put the scene in.


Friday, March 2, 2012

A little bit more T5

Well, you knew I wouldn't be able to leave this alone!

First, the dress from cardstock ((#9), napkin (#25) and ribbon (#18).

I started with the dress shape cut from cardstock and a piece of the top ply of the napkin.


The piece of napkin is wrapped around the front of the dress shape and glued to the edges of the back.
 The bottom edge of the napkin is glued in five spots along the bottom of the dress shape.

The napkin is gathered at the waist and a piece of ribbon wrapped across the front and the ends glued to the back.
 The top of the napkin is shaped across the bodice and folded to the back
 then the back piece is trimmed so it folds over the back about 1/4" then it's glued to the back.

I've glued ribbon to the back to form straps.
 And here's the dress:

Now for the hat. On the computer I made two pattern pieces: one .8” diameter circle and one strip 2.9” x .3”, printed them out and used them to cut the pieces from a piece of felt.


Spread glue around the edge of the felt circle
 then add the strip of felt around the circle and join the ends of the strip with glue.

Where the strip met, I added some feather pieces. I then cut a narrow (about 1/8" wide) strip of the napkin and spread glue along the length of the wrong side then wrapped it around the lower edge of the hat.

 Finished hat:

I knew that I wanted to use the tea leaves from the tea bag (#21) as dirt in a plant pot (#10) but didn't really see anything on the list to make a plant from.

But I had taken out green silk (as #22 - piece of green fabric) and it caught my eye. So I cut out a small piece of it and decided to experiment.

I coated the entire piece of silk with Weldbond glue
and let it dry. Absolutely love the effect!
 I cut a bunch of leaves from the glue-covered silk and shaped them with my fingers. They look SO good! (If I do say so myself VBG)

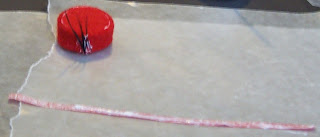
I had this blue bottle cap but didn't care for the colour for a plant pot. (Normally I love the colour.)
 So I've covered it with a generous coating of gesso and I'll paint it terra cotta when the gesso is dry. For this I wanted a rough finish so didn't smooth the gesso.

I'll let it dry overnight then try to arrange my leaves in it.

Thursday, December 8, 2011

child's loft bed, wash basin

I don't ordinarily look through RL furniture flyers but did yesterday and spotted this child's bed which would be SO wonderful in miniature (especially since dollhouse rooms tend to be so small). It comes in two options: with the shelving or with a trundle bed.


If I were doing a child's bedroom, I'd make this for it in a heartbeat...and with little Houseworks casters on the trundle bed. And pretty simple to make - especially if you made faux drawers rather than real ones under the steps.

It's really tempting to make it anyway just for the fun of it. But at this point I better just concentrate on finishing the Bombay house.

I took President's Choice salmon  mini-wellington's to the MEE Christmas party (more about that later). They're very tasty. AND the packaging has great mini possibilities.

They come in a clear plastic tray with insets for holding the tarts. The ones marked with an 'X' have a little scooped section along the top edge so I ignore those.

But I cut apart the other six. Below you can see where I've trimmed the edges around the top of two of them and I've coloured one with a red felt marker.


The're 2" in diameter across the top and 3/4" high so make a nice dishpan.


Although marker works well to colour this (and copper or some of the more gray silver nail polish would probably work), don't think the plastic would take paint unless it was primed. Another possibility would be to give it a thin layer of gesso, then paint it blue or red and give it a spackleware enamel finish like this:

To get the spackleware look, dip an old toothbrush in a bit of white paint and run your thumbnail over it so the paint spatters in small drops. You may want to practice a bit on a scrap of paper until you get the direction and size of your spatter right.