First, the dress from cardstock ((#9), napkin (#25) and ribbon (#18).
I started with the dress shape cut from cardstock and a piece of the top ply of the napkin.
The piece of napkin is wrapped around the front of the dress shape and glued to the edges of the back.
The bottom edge of the napkin is glued in five spots along the bottom of the dress shape.
The napkin is gathered at the waist and a piece of ribbon wrapped across the front and the ends glued to the back.
The top of the napkin is shaped across the bodice and folded to the back
then the back piece is trimmed so it folds over the back about 1/4" then it's glued to the back.
I've glued ribbon to the back to form straps.
And here's the dress:
Now for the hat. On the computer I made two pattern pieces: one .8” diameter circle and one strip 2.9” x .3”, printed them out and used them to cut the pieces from a piece of felt.
Spread glue around the edge of the felt circle
then add the strip of felt around the circle and join the ends of the strip with glue.
Where the strip met, I added some feather pieces. I then cut a narrow (about 1/8" wide) strip of the napkin and spread glue along the length of the wrong side then wrapped it around the lower edge of the hat.
I knew that I wanted to use the tea leaves from the tea bag (#21) as dirt in a plant pot (#10) but didn't really see anything on the list to make a plant from.
But I had taken out green silk (as #22 - piece of green fabric) and it caught my eye. So I cut out a small piece of it and decided to experiment.
I coated the entire piece of silk with Weldbond glue
and let it dry. Absolutely love the effect!
I cut a bunch of leaves from the glue-covered silk and shaped them with my fingers. They look SO good! (If I do say so myself VBG)
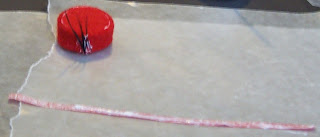
I had this blue bottle cap but didn't care for the colour for a plant pot. (Normally I love the colour.)
So I've covered it with a generous coating of gesso and I'll paint it terra cotta when the gesso is dry. For this I wanted a rough finish so didn't smooth the gesso.
I'll let it dry overnight then try to arrange my leaves in it.


me encanta!!
ReplyDeleteGracias.
ReplyDeleteMaureen