Saturday, December 23, 2023

Merry Christmas!

Vern's Attic arrived and Jonah and Holly were quite excited to receive it.

I knew I had taken a picture of it before I packed everything up. (It was on my phone?!?)

Here they are unpacking the box.


I'm hoping they'll send a picture of it tomorrow when they open the last package to complete it.

So I was all set for our club Christmas party on December 5! Santa's elves had delivered my Secret Santa gift from me and delivered my gift from my Secret Santa, Shirley B. It was a box of delightful Christmas minis.

Gifts, wrapping paper, cup of hot chocolate with a candy cane stirrer, plate of cookies, a Christmas candle, a tiny decorated tree, a wreath and a teddy bear, along with a tiny personalized Christmas card.
Love the pipe cleaner teddy! Mine never looked as good as this one!


Unfortunately, I woke up the morning of the party with the absolute worst sore throat (felt like it was full of razor blades) and ended up sleeping through the party. Tested for COVID on Thursday - Negative. Thought back about 45 years and thought, "Oh, no, I have tonsillitis." Got an appointment with my doctor on Friday. He's only a couple hundred metres away but I had to get my sister to drive me there as I didn't think I could walk that far. He gave me a really powerful antibiotic and some wonderful mouthwash to deaden the pain in my throat. 

By Tuesday I was feeling well enough to meet up with some MEE members for coffee at the Enjoy Centre and have a wonderful visit.

Having lost a whole week, I was really in a dither. The Book that I do annually for family and friends had to be finished and put in the mail. Spent the weekend copying, collating and binding it and finally for the copies that had to be mailed on their way on Monday. DS Marie received hers Thursday so that was a big relief...and a minor Christmas miracle!


 Then, minor panic time again! Out condo Christmas potluck dinner was on Tuesday and I hadn't even started the roombox/vignette that I give as a door prize every year. 

I decided to use a Michael's photo box as the container this year. Size is good: 11 1/4" wide x 7 1/2" tall and 4 1/4" deep. Plus it has a lid so it's easy to store. The only drawback is that the inside of the box is black so it has to be covered.

Used white cardstock for the ceiling.

Added wallpaper. For the floor, I cut a piece of white cardstock and covered it with dark green velvet for a carpet.

The tree and skirt with gifts is by Louise Z. who is a dealer at our annual Show and Sale.
 The table was from Dollarama and 'painted' with red marker. The Christmas cactus, chair, ottoman, and Barbara Brear book were from my stash. There is a pair of glasses on the end of the table. The picture is from the back of a calendar and is framed with a coffee stir stick cut and then coloured gold.

Only baking I got done was a HUGE batch of nuts and bolts. Still have some wrapping to do but not too much.

Leanne and I will be spending Christmas with my sister, Shirley. Her friend, Marilyn, will be cooking Christmas dinner and we'll be joined by Shirley's grandson  and his family. Will be a wonderful day!

I hope that you all will have a wonderful holiday with your families and loved ones.

Thursday, November 30, 2023

The Attic - finished!


I finally finished  all the 60-odd contents of "Vern's Attic" on Sunday. Got them all packed up in daily packages for the Advent calendar for Jonah and Holly.

Got everything written up in the book, printed and bound.


It took about 12 hours to write and print the book and another 8 or so to pack everything up and number all the packages.

The bare-bones of the attic.

Sent everything off to my Dear DIL Julie, who will look after the distribution of this as an Advent Calendar.

I could have sworn I had taken a picture of the attic with the pieces in it beforehand but evidently I didn't. A small part of the delay in posting was trying to find at least one picture of the attic with something in it.

It will arrive in Peterborough tomorrow morning - just in time!

I already have ideas for half of new things for next year and I've asked Julie to listen for anything else that Sean might mention as they furnish it with what I've sent so far. (And I'll probably print out the book for DD Leanne so she can suggest additions since it was her idea in the first place.)


Tuesday, November 14, 2023

SORRY

I ran into a few problems with the roombox design.

Then suddenly it was mid-November and I'm in a real time-crunch for a Christmas gift so that has to be my first priority right now.

My dear husband Vern died in July 2011. Shortly after that I began "Vern's Attic" which was a project that was meant to share my memories of him with our grandchildren who were 3 and 5 at the time so they could have some memories of Grandpa Vern. 

I guess maybe I have kept putting off completing it because it would mean finally letting go.

Earlier this year, I told my DDIL Julie that I would give it to the grandchildren as an "Advent Calendar" .

The attic itself will be the calendar then each of the memories would be put in a capsule to be opened each day. 

I will write a story about each of the things in the attic and put the stories in a book that will go along with the attic.

So you can understand why I have to delay the work on the roombox.


Thursday, November 2, 2023

A bit of a catch up - and back to the roombox

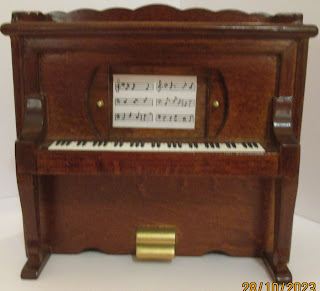
First of all, I want to tell you about something I just noted about the piano I told you about the other day. I think this is probably the fourth piano I have bought over the years. All the others have had just printed keyboards. This one has a keyboard that actually has individual keys! You can run your fingers over them and the ebony keys are raised from the ivory keys! WOW!

Now that I have shared that - back to the roombox.

My original idea was to have a second smaller room which would be a bathroom.

Then I was watching HGTV and thought, "Oh, my. I should make that second room into a walk-in closet."

Got out my Clothes, Hats, and Shoes bulletin boards...

and thought, "Oh, yes. I can clear most of this from my stash if I do that."

So now I'm trying to decide what to do with that second room.

BUT I need to show how to put the room together....

And part of it should be adding wallpaper and flooring ahead of time....

So I guess I will figure out where to put that wall for the second room, wallpaper the bedroom portion, and just leave the second room decoration for later.


Monday, October 30, 2023

M.E.E. Mini Day Out yesterday

What an incredibly fun day it was! Almost 30 members showed up throughout the day and it was SO great to see both old and new members get together and get to know each other.

Lisa, bless her heart, gave me a wonderful mini crocheted sweater that she had made.

 She has been asking me for an interview for her YouTube channel but I've been so busy with STARFest that we haven't been able to set a time for it so we'll discuss that next week.

Pat M. warmly welcomed everyone, gave them name tags and entered their names in the door prize draws.

There was a table full of freebies: magazines donated by both Tina and the club, and items from Margaret C., Liliane V., and Erika B.

This wonderful chair with the kitty was from Margaret C. I think it's just precious - and it's so "Margaret" as she is such a cat lover.

June K. displayed two pieces of her wonderful 1:48 work.

Unfortunately Tina was unable to attend and demonstrate making a shadow box in a frame but Pat M. and Maureen M. took over and capably handled that demonstration. Tina's instructions are available at the M.E.E. website here

After lunch, I gave a quick demonstration of the roombox constructed from double sheets of foamcore. Lucille was very helpful in that with her questions and suggestions.

Many, many years ago, Joanne had purchased a bolt of cotton fabric from the Estate of Jane and Paul, the owners of The Toy Shopped just off Whyte Avenue. It was one of those "someday" projects we all have. She brought it to the Day Out to pass it on for just $1/yard. I bought 5 yards of it with the idea of making a caftan/muumuu for those days when I'm feeling lazy and don't want to answer the door in my nightgown. LOL. There were several comments about it turning from her UFO (Unfinished object) to mine. We'll see.

If I were going to do a Southwestern mini project, the patterns in this would be so wonderful for rugs, runners and/or wall hangings. If you would like a piece (or two) for that purpose, let me know in the comments.

Erika then drew for the door prizes. They included three of Tina's handmade vases, a beautiful "Fall" 1:48 scene under glass from Joanne, a DIY kit from Kathy, and a shadowbox from a frame.

As soon as that was over, Pat and her incredible team set up the sale tables of the items left over from all the garage sales and the show and sale. All 1/2 price! What anticipation!

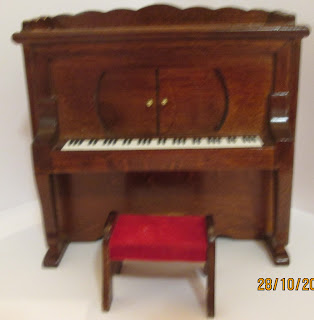
I really had no plan to buy anything BUT as I was standing in line waiting for the sale to begin, Pat wound up the music box on this player piano and I HAD to have it. It plays "Fur Elise" which is one of my favourite pieces!

So I stood in front of it until the sale began and grabbed it up!


Not terribly keen on the piano bench but I can replace that.

When I got to check out, there was a selection of incredible miniature books. Do you recall everything was 1/2 price?

So I bought these two....


This one is SO beautifully bound. I just love it.

So by then, my back it killing me and I think I don't need anything more so I visit a bit with other members and see what they've bought. And that is such fun.

But then, the crowds around the table thins and I think, Oh, well, maybe I should check it out.....

Actually, I didn't spend that much but I did find a few things that I liked.
This 4" Christmas tree looks gold but it's actually bright silver and it's something that I might be able to use in my DD Leanne's memory box.

I am so thrilled to get this TicTac container of 1/2" nails.

Oh, my, This was in a tube when I bought it and I wasn't too sure just what it was but I was hopeful. Since it was only 25 cents, I thought if it wasn't what I thought, I could just use it as a piece of brass trim on something but.....YES...it was a miniature piano hinge! 

It is just under 4" long and 7/64" (?) wide. Have absolutely no idea what I will do with it but I love piano hinges in RL so will figure it out. 
 
Got this for 25 cents. This 18" RL chain is so fine that it can be used for future 1:12 jewellery.
 

A double hung window to go in my stash...Nyah...don't really need it but will come in handy someday.

I must thank all the club members who helped set up, take down, help during the day, cleaned and cleaned up. Thanks to you all. You made my day much easier.


Wednesday, October 25, 2023

Roombox from Foamcore 2


Sorry this has taken so long to post but real life interfered then last night I got working on the blog and discovered I was missing some pictures then the camera battery died and I had to wait for it to charge.

I used my utility knife for the cuts and my X-Acto knife to separate the foam from the cardboard.

Take the 20 x 30 sheet of doubled foamcore and cut it half lengthwise so you have two pieces 30 x 10.


Take the second sheet which has one half double foamcore and the other half single foamcore. Cut along the double sheet to separate the single sheet from it. Set the piece of single sheet aside for now.

On each of your 30 x 10 pieces of double foamcore, mark two vertical lines - one at the 9 5/8" mark and another at the 10" mark. Very carefully cut along each line trying to cut only through the top two layers of cardboard and foam but not the very bottom layer of paper. If you do cut through a bit of the bottom paper, it's not an insurmountable problem as you will be gluing everything together eventually but it will be tidier if you don't have to deal with it.

Fold the foamcore back against itself at the 10" mark. This will allow you take your X-acto knife and carefully cut along the back of the 3/8" wide piece to remove it leaving the final piece of backing in place as below.

At this point I realized I hadn't taken pictures to show this so I took a scrap of foamcore from a previous project to show this step.  AND THEN I HAD MY 'AHA' MOMENT!

I made my vertical cuts just through the middle layer of cardboard. When I folded the right hand side backward, I heard a pop and the foam that hadn't been cut through broke right along the cut line! So no worry about accidently cutting through the back cardboard. Wish this had happened earlier. My other cuts would have been so much easier. 


Here you can see the 3/8" section that  needs to be removed.

I used my X-Acto knife to cut under the foam to begin removing it.

The top layer of foam  and cardboard just peeled off.

Then the bottom layer of foam peeled off fairly easily with a bit of encouragement from the X-Acto blade.

Here you can see how the foamcore folds into the hole to create your right angle.

First sheet done...

Once both sheets have the vertical cut out, you need to draw a line 3/8" in from the edge of the tops and left hand sides (at the end of the 20" piece) of both pieces. Then cut away all but the back piece of cardboard. (You can just barely see the result at the top of the bottom piece below.


You then fold the 20" piece into the hole you have formed. This will give you a 20" ceiling (or floor) and a 10" wall. When you have done this to both pieces, you will have two "L" shaped pieces which you put together like this. 

Because I'm demonstrating this on Saturday, I have not glued it at this point. It is put together with "T" pins.


Place the box face down. Take the remaining 20" x 10" piece of double foamcore and place it carefully within the 3/8" border of cardboard and pin it in place.


You still have the single layer of 10" x 20" foamcore left. There are a few possibilities for this.

You can cut a 2" x 20" piece and put it along the ceiling about 1" from the back wall. You can then backlight your scene by adding a string of LED lights behind that. You can cut a 3/16" channel in the ceiling and side walls and fit your piece into that (after trimming back to 19 5/8" long). This will lend additional stability to the room box.

OR

You can trim the sheet of foamcore to 19 5/8" x 9 5/8"and cut a picture window in it . Place an outdoor scene on the back wall, perhaps add some LED lights then cut a 3/16" channel all the way around the roombox about 1 1/2" or so from the back wall and insert your second back wall.

OR

Use a double layer of foam core and


Build a partial wall between, say, a bedroom and a study. Build in a bookshelf and/or space for a TV.

OR

Build a full wall with a door and make a bedroom with an ensuite.

If you want to use the room without any divider, it would be good for a living room/dining room; kitchen/dining room; or just about any combination you want.

NOTE: This was built to make the optimum use of 3 sheets of foam core. The use of the laminated foam core gives it a stability that a single sheet would would not have. And the foamcore into foamcore joints give it further stability and strength. 

The box itself can be any dimensions that you choose....

An earlier (unfinished) project based on the same premise 


FURTHER: I will re-visit this after Saturday when I demonstrate it for my Mini club. That will allow me to address  any questions they may have, make any adjustments, and actually glue the room together.


Saturday, October 21, 2023

$5.00 Roombox from Foamcore

 You can build a 20" x 10" x 10" sturdy, but yet light, roombox from three 20" x 30" sheets of foamcore that you can buy in Canada at Dollarama for $1.50 a sheet.

You will need:

3 sheets of foamcore 

(Dollarama was out of black formcore when I worked on this. I probably would have done it with  black outside and a white inner.)

Glue (I've tried a few and the best I have found was Weldbond).

A wide piece of plastic to spread the glue (I used a 6" wallpaper smoother but any piece of plastic will do)

A straight edge (I used a carpenter's square to ensure my angles were correct but a good corked back ruler will work.) 

An X-Acto or utility knife with a NEW SHARP blade.

If your cut looks like this, you need to change your blade.


CUTTING FOAMCORE

The key to cutting foamcore is:
Besides the NEW SHARP BLADE
Three cuts:
Cut first through the upper cardboard layer
Then cut through the foam layer
Then cut through the lower cardboard layer

In this case where you're working through two layers of foamcore:
cut through the first cardboard layer,
then through the first foam layer
Then cut through the double cardboard layer
Then through the lower foam layer
And lastly through the last cardboard layer.

First:

Glue two pieces of foamcore together. (If the glue is not evenly spready, you may have trouble cutting through it.) Make sure they are aligned perfectly. Then weigh them down evenly with  books, stacks of magazines, whatever...just something that is heavy and evenly divided over the foamcore. 

You need to be quick with this before the glue has a chance to dry.


Take the third sheet of foamcore, Cut one third of it (10" x 20") and  glue it to the remaining 20" x 20".
Weigh that down as you did the othersl 

Make sure that your foamcore sheets are firmly adhered to each other. At least 24 to 48 hours.

Tomorrow we'll construct the roombox.


Friday, September 29, 2023

Scentimental Journey - Repaired

So now I had to figure out how to put the shelves of perfume bottles back in place.

I made this block of Legos that would represent the distance between the shelves.

I put it against the mirrored back and used a very fine tipped pen to mark the bottom of it - and that was where my shelf would go. Put a very fine line of Gorilla Super Glue gel on the back edge of the shelf, lined it up against the line then VERY quickly put the Lego against the shelf to keep it at a right angle against the glass.

Repeated that for the four upper shelves.

The two lower shelves were a bit more problematic as there wasn't a great deal of room for Lego blocks to keep things straight.

I did get the line for the shelves drawn using the Lego piece above but still needed to  find a way to make sure the shelves were  level from below. So I used two Lego pieces plus a bit of wood to line them up then placed the shelves. Had to pull up the wooden pieces quickly so they wouldn't stick to the Super glue.


Once all that was done, I took a dampened Q-tip and erased the pen lines I had made to line up the shelves. Then I replaced the glass front and the side of the frame.


Best picture I could get with the mirrored back.

But I am pleased with the restoration.