Laurie had made some great sinks for her washroom trailer from a plastic paint palette. I didn't see exactly what she used but she ended up with a row of sinks in a white counter so I think she must have used one like this:
We came up with taps and a faucet made from some head pins, silver beads and two bugle beads.
The ones I made to show you are built on a piece of wood and would be glued in place later. (The ones for Laurie's sinks could be built straight into the counter.)
For this you need:
1" piece of coffee stir stick
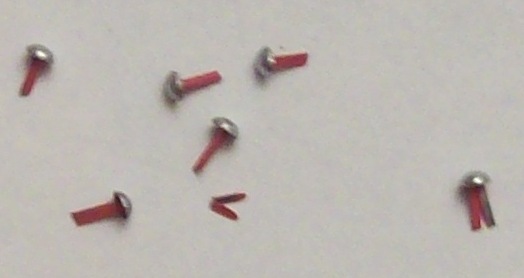
3 one inch head pins
3 silver beads
2 clear or white bugle beads
emery board
pin vise drill
silver pen
Tacky glue
needle nose pliers
wire cutters
Cut a 1" piece of wood from a coffee stir stick. Across the middle of the wood, drill three holes: at the 1/4", 1/2" and 3/4" points.
Using the emery board, round the top edges of the wood, then colour it silver.
Feed the head pins through the three holes from the bottom so the heads of the pins are on the bottom of the wood. Run a small strip of tape across the bottom to hold the pins in place. From the top, add a silver bead to each pin. Glue each silver bead to the wood.
About 1/16" above the outside silver beads, bend the outside pins at right angles.
Using a round shape such as a pen or pencil, shape the top end of the middle pin into a faucet.
Put a small amount of glue on the outside pins near the right angles. Slip a bugle bead over each of the pins and slide the bead down to the right angle. Then, using the wire cutters, clip off the end of the pins extending past the bugle beads.
When you're ready to install this, remove the tape from the bottom of the wood and glue it to the counter top behind your sink. (If you're careful and keep the glue away from the pin heads, your tap handles will turn and the faucet will swivel.)
Showing posts with label beads. Show all posts
Sunday, April 1, 2012
Saturday, March 3, 2012
T5 final pieces
Here a tea leaf/glue mixture has been added to the plant pot.
I took about 3/4" from the end of a round toothpick and glued the plant leaves to it. When that glue was dried, I glued the end of the toothpick
and planted it in the pot.
Also last night I found this butterfly bead. The left hand side has been painted with the Sakura 3D glaze pens, the body with black marker, while the right hand side hasn't yet been recoloured.
I used a straight pin to add the completely painted butterfly to the plant pot.
I printed a label from the internet and wrapped it around two cotton balls for a package of quilt batting.
I stripped the four Q-tips of their cotton ends and painted them green with a marker.
And used them to frame the mirror.
I heated the pin on a small push pin with a match and used pliers to remove it. Added a fingernail sticker to the push pin, added a bead for a light bulb and another bead for the shade.
Labels:
beads,
butterfly,
cotton balls,
gesso,
lamp,
leaf,
leaves,
mirror,
push pin,
Q-tip,
quilt batting,
straight pin,
toothpick
Saturday, February 25, 2012
Slow going...
Every time I clean, I promise myself that I'll just put things away. But every time I come across items just waiting to be made and I just can't stop myself. VBG
I had taken these beads and mini brads out of one of my bead boxes with the intention of making a series of spice jars. Rather than put them back, decided to go ahead and make the jars.
I got these tiny scrapbooking brads (5/16" long) on clearance at Michael's in Kelowna. I've had the beads (7/32" long) for years.
Using my Pilot pen, I painted the ends of the brads silver.
I clipped about 1/3 off the ends of the brads.
Dipped the ends of the brads in glue and inserted them in the beads. And, voila, six spice jars for the kitchen!
Also on the table was a partial sheet of paper with two Lysol can strips and two spray starch strips. Makes more sense to make them up than tuck the paper away...and it also gave me a chance to try my new quilling tool.
Labels:
beads,
brads,
quilling,
silver,
spice jars,
spray cans
Saturday, November 26, 2011
drawer for the Michael's hutch
Sorry it took so long to get back to this but RL is getting in the way (big time) of minis. LOL
Yesterday, four of us took the "Homes for the Holidays" Christmas house tour in Edmonton then went out for dinner. When I got home there had been a problem with the condo guest suite that I look after renting out and had to deal with that.
My work room is such a mess that it has to be cleaned (or at least tidied) before I do anything more (can't find a thing), paperwork has fallen behind and I've undertaken the most fun project for a young miniaturist so the blog may be a bit neglected in the next couple days.
Anyway, on to the drawer.....
You'll remember that when I took the hutch apart to stain it, I also removed the false drawer front from the bottom of it.
It has been sanded and stained.
I measured the bottom of the drawer opening. I subtracted the thickness of the drawer front from the depth and cut the drawer bottom. the drawer back was cut the same length as the bottom. It's not quite as high as the opening as I don't want it to fit too tightly. The end pieces are cut to fit between the drawer front and the back.
Using wood glue, the bottom of the drawer is glued to the drawer front. Lego blocks hold the wood in position while the glue dries.
The sides are glued on top of the drawer bottom and to the drawer front.
The drawer back is glued to the bottom and against the sides.
I didn't fill the drawer/door pull holes before staining because I have some beads I plan on using for pulls.
The tool is a Xuron sprue cutter that I got at Hobby Wholesale in Edmonton. It's a modelling railroading tool and makes great flush cuts. The beads are a string of Christmas trim.
Sorry, between the size and the sparkle, couldn't get a very good picture. The round faceted bead will be the pull and there's a small section sticking out that, when filed down, will fit in the holes.
And here's the finished cabinet:
The wood doesn't take stain very well and the grain is too large for scale which is one reason I prefer to do them with black or red markers.
Yesterday, four of us took the "Homes for the Holidays" Christmas house tour in Edmonton then went out for dinner. When I got home there had been a problem with the condo guest suite that I look after renting out and had to deal with that.
My work room is such a mess that it has to be cleaned (or at least tidied) before I do anything more (can't find a thing), paperwork has fallen behind and I've undertaken the most fun project for a young miniaturist so the blog may be a bit neglected in the next couple days.
Anyway, on to the drawer.....
You'll remember that when I took the hutch apart to stain it, I also removed the false drawer front from the bottom of it.
It has been sanded and stained.
I measured the bottom of the drawer opening. I subtracted the thickness of the drawer front from the depth and cut the drawer bottom. the drawer back was cut the same length as the bottom. It's not quite as high as the opening as I don't want it to fit too tightly. The end pieces are cut to fit between the drawer front and the back.
![]() |
Left: drawer front Centre: drawer side, drawer bottom, drawer side Right: drawer back |
The sides are glued on top of the drawer bottom and to the drawer front.
The drawer back is glued to the bottom and against the sides.
I didn't fill the drawer/door pull holes before staining because I have some beads I plan on using for pulls.
The tool is a Xuron sprue cutter that I got at Hobby Wholesale in Edmonton. It's a modelling railroading tool and makes great flush cuts. The beads are a string of Christmas trim.
Sorry, between the size and the sparkle, couldn't get a very good picture. The round faceted bead will be the pull and there's a small section sticking out that, when filed down, will fit in the holes.
And here's the finished cabinet:
The wood doesn't take stain very well and the grain is too large for scale which is one reason I prefer to do them with black or red markers.
Subscribe to:
Posts (Atom)