Saturday, November 17, 2018

Last year at a Mini Day Out, we decorated 42 mini tables for Meals on Wheels to accompany meals in December. You can read about it and see the basic instructions here. They only need 8 this year so I'll just do them myself. BUT as a club, we thought that we could make more tables to include in our children's grab bags for the next show and sale on September 15, 2019.

To speed up the process of cutting the cups, I decided to use the hot wire styrofoam cutter that my late BIL gave me when he quit model railroading.  The heated wire cuts through styrofoam very quickly and cleanly. In order to keep the cut perfectly straight, I taped it to my 3 hole punch which fortuitously was the exact height I needed.


I first tried it with the bottom of the cup down but there wasn't enough room between the wire and the base of the punch to cut all the way through.

So I turned the cup right side up and that worked perfectly!

I bought four different packs of cupcake liners at Dollarama to use as tablecloths and here you can see four mini tables that resulted.


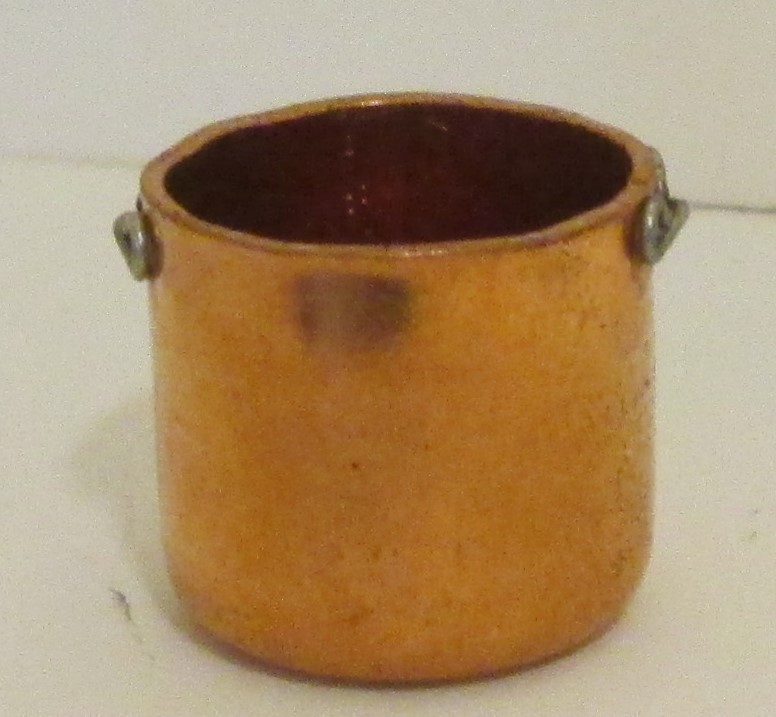
In a story for another day, I'm actually tackling cleaning my workroom! While doing so, I came across two childproof pill caps. Using pliers, I pulled back the edges of the caps and removed the clearish plastic inserts.

I trimmed the thin rim of plastic around the bottom edge and ended up with a bowl 1 3/8" in diameter and 7/16" deep.

Voila! A salad bowl.


Thursday, November 1, 2018

Saturday All-Day Workshop

Got so busy that I didn't think to take any pictures but....

I love the days when a number of us get together...there is a certain magic that happens. The ones who have been doing minis for a long time and the newer ones share their ideas and methods. Someone mentions a problem or idea and the ensuing conversations just bring up SO many new ideas!

Gilbert was the first to present in talking to/showing us about making a clock/radio/soap container into a miniature display. He explained the different tools he uses to do that....for wood and plastic.  He was showed us the different Dremel tools he uses for plastic and tin. He demonstrated the tools for cutting through plastic but because of the noise, he didn't demonstrate the tools for cutting through tin although he did emphasize the necessity of safety tools (safety glasses, ear protection and face mask).

I talked very quickly about  reinforcing a gift bag to make it into a "room box". Although, in the past, I have done each wall separately, I said that I thought it might be better to do it in one piece by scoring the corners from the back and folding them. We agreed on that then Tina mentioned that Brooke Tucker had suggested that for making a curved wall, you score the material vertically along regular intervals across the back...which gave me the idea of how to cover my wall in the miniature in a circular box that Tina would be teaching later in the day.

Marg, our resident artist, spoke beautifully about making a scene in a book box. She showed us how to make a leather-look cover for the book using tissue paper and paint and showed us how to age book pages with chalks. She also spoke about making scenes more like-like by using chalks to develop shadows, etc., in corners and along other lines. She also spoke about sometimes seeing things from a different prospective after it's been done and perhaps changing how you would have done it.

Tina showed us how to put a "floor" in a round container - including a method of hiding a battery under the floor so it's out of sight and easily changeable.

I also quickly demonstrated making knives from the ends of turned toothpicks and we discussed using a quilling tool to make cans of spray paints and cans of foods for a pantry.

Almost 40 years ago, we took our two children on an extended trip through the western United States. We, of course, went to Anaheim, CA, to see Disneyland and Knott's Berry Farm. At that time, the Mott Miniature Collection was displayed at Knott's Berry Farm. And I absolutely fell in love!

Then I discovered Casey's Wee Littles, my first miniature store.

When we returned home, I started trying to make things on my own and the next Christmas, Vern and the children gave me my first dollhouse kit.

As the years passed, I amassed quite a collection of books on making miniatures and learned to make more and more things.

Then at some point, I discovered the on-line miniature group "Small Stuff" and my world expanded.

Daughter Leanne moved to Garland, TX, for two years and while she was there I attended Dallas Mayfest where I took some classes and attended my first big miniature show. One of my delights there was finding a stack of Nutshell News magazines that gave me endless ideas on what and how to make even more things.

In 2002, the big search for turned toothpicks was exploding on Small Stuff. Joanne e-mailed Small Stuff and said that she had checked out WalMart and they didn't have them. I e-mailed her to thank her for saving me a trip to check them out and we discovered that we only  lived a few blocks from each other.

She took me to the summer get-together of M.E.E. (held at Judy Mitchell's that year) and I joined the club in the fall. 

So I've worked on my own, with the aid of on-line groups and as part of a club.

And to my mind, with a club is best. While I certainly could have continued on my own, especially after so much became available on the internet, the knowledge, ability, and immediacy of those things in a club has made me a much better miniaturist.

Thanks to all my fellow miniaturists over the years.


Friday, October 26, 2018

Mini Workshops for Saturday

I'll be sharing some my ready-made lettuce made from artificial snow flakes, and a few other things and ideas.

Will have kits available for the following:

This bedspread is made from just over 7' of daisy trim.


The shampoo, conditioner and bubble bath jars are made from Lite-Brite pegs.
The salt and peppers are made from tiny cylindrical beads and scrapbooking brads.

Life preservers from fun foam.

Bowls made from quilling paper.

Stock pot made from a copper plumbing end cap. (Demo only)

For the pantry, canned goods and cleaning supplies  (quilled paper)

LP Records and covers

I'll also have a non-working parts cabinet and cans of spray paint (unable to load a picture right now.)

One of my all time favourites is making knives from toothpicks.

Wednesday, October 24, 2018

M.E.E. All Day Workshop, October 27

Saturday will be our first all day workshop for this year. We'll  have lots going on!

There will be four separate workshops during the day in line with this year's theme of using an unusual container to house a miniature scene..

We'll start at 9:00 with muffins and coffee and set-up.

At 9:30, Gilbert will teach us how to use a tin or plastic container as a miniature setting.

I'm planning on housing a laundry room in this.
At 10:30, I'll be showing how to reinforce a gift bag to use as a roombox.
This is the large gift bag I'll be using to demonstrate but you can do this with any size gift bag to house any scale.
At 11:30, Marg will be using a wooden book box from Michael's to demonstrate. This can also be done with the cardboard book boxes from Winners.
I may use this chocolate box to follow along.

Here it is closed.
 After a quick lunch at 12:30, at 1:00 Tina will teach us to build a setting in a round container.
This is already coming together in my head.
Throughout the day, I'll also be teaching several 10 - 15 minute mini-workshops that I'll tell you about tomorrow.

Non-Mini 

I got the first third of "The Book" collated.

I'll leave the other two-thirds until after Saturday's workshop. Collating them takes a lot of room plus I can't work on them for very long at a time as it's hard on my back.

Saturday, October 20, 2018

Repairing the Penthouse

I made the penthouse in 2009 but had never shown it so displayed it at our 2018 Show and Sale. A battery had leaked in the battery pack for the balcony lighting so it had to come out - and the lighting in the bedroom was so weak it didn't show anything off.

Not only that, when I transported it, I realized that I had never glued the back on :-( . It was just held in place with T pins.

So when I got it home, it sat on the dining room table awaiting repairs.....and sat.....and sat.

Since I'm hoping to have some family here for breakfast tomorrow morning (all my sisters and one BIL are in town for DS Shirley's 70th birthday celebration), I could put it off no longer!

For the reasons stated above, I tore out all the old lighting from the back of the roombox

And replaced it with a strip of LED lighting from Dollarama. 

Added a strip of carpet tape to the back of the battery pack.

And stuck it to the back of the roombox. (For some reason, it didn't stick - which was okay since I ended up just placing it on the top of the roombox so I can just reach it and switch the lights on.)

For some reason, adhesives weren't working for me today. The LED strip lighting self-adhesive didn't hold worth a darn so had to glue that down. Held it in place with clothespins while the Weldbond dried.

When that dried, I applied Weldbond all around the room back and in the valley where the room divider was, put the back on and taped it until the glue dried.

Here is the roombox with the new lights on. Much better. Love it.

The book in the living room is holding down some tiles that I also had to re-glue.


Everything back in place and ready to put back on the bookshelf.

The new lighting is such a vast improvement and the fact that I can leave the battery pack on the roof allows me to turn the lights off and on so much more easily.

Friday, October 19, 2018

FSS - Flat Surface Syndrome

I don't remember exactly which of my miniature friends came up with this particular acronym - but it certainly applies to me.

Every flat surface in my home is always covered with this, that and the other thing.

Unfortunately, every purchase, workshop item and tool does not get put away when it should.

But, occasionally, I do get caught up at at least one point.

I have a 6' table in my living room that has been a nightmare for quite some time.

Now, I could have shoved everything into a box and considered it done...BUT...this time, I didn't do that. I took everything - one at a time - packaged it in ziploc bags and stored it properly.

Halfway through when I started...

When I finished...
 Now the pages of "The Book" are poised at the end of the table to be collated and bound.

Sunday, October 14, 2018

All non-mini - Lot of things going on in my life

Sorry I haven't been posting but there has been a lot going on - all non-mini....

including this!

Spent most of today printing "The Book" that is my Christmas present to my friends and family.


DS Shirley's 70th birthday is on Wednesday but we will celebrate it on Saturday. Younger sister, Carol, will hopefully be there for that before she and her husband leave for Arizona for the winter so wanted to get "The Book" done this year before they left so they would have it for Christmas this year. I've not had it done in time the last couple years so they didn't get it until they came home in the spring.

I still have to collate and bind the book which will take awhile.

In the meantime, I have a lot of ideas for the club's Full Day Workshop on October 27....

Will share some of those things soon, I hope.