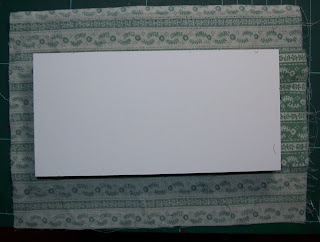
I used:
soft foam (I didn't have 1/2" thick so I used two thinner pieces - see below)
the mat board piece from the bed
foam glue
straight edge
utility knife
scissors
fabric (see below)
Weldbond glue
Most miniature bed mattresses are made from 1/2" foam. The few pieces I had of 1/2" thick were not large enough. I had several thick kitchen sponges which I could have used in a pinch but (1) they would have had to be cut to the right thickness, then pieced to the right length. (You can, and I have, cut these with a serrated knife such as a bread knife or an electric knife but I always have a problem getting a good straight even cut.)
But I did have lots of thinner foam (about 1/4 - 3/8" thick). One of the advantages of a thinner foam is that you can get a fairly straight edge cut with a good pair of scissors.
To begin, I removed the piece of mat board from the bed and trimmed it (on one side and end only) by 1/8" to allow for fabric wrapping around the edge.
Then I used a very fine black marker (a microtip pen) to trace around the mat board on to the foam then cut two matching pieces of foam.
I bought this glue for styrofoam the last time I was in the U.S.
I used it to glue the two foam pieces together and to the mat board.
I then used the foam glue to glue the foam side of the mattress to the wrong side of the fabric. When the glue had set, I took a tiny pair of scissors and cut and removed the wrong side fabric and the batting (being careful not to cut through the bottom layer of fabric - the mattress cover). Here three sides of the fabric have been removed, with the layers on the right hand side at the end of the mattress yet to be removed.
And here with all excess layers removed.
Here the single layers of fabric have been wrapped around the sides of the mattress and glued to the matboard with Weldbond.
Then the end pieces are wrapped around the ends of the mattress (like wrapping a gift) and the ends glued to the matboard.
Here's the bottom of the mattress with the ends of the fabric glued in place. (Because I had cut the fabric a bit short there wasn't a great deal of fabric to wrap around and glue to the left hand end. So there I used a strip of adhesive tape to hold the fabric in place until the glue dried.
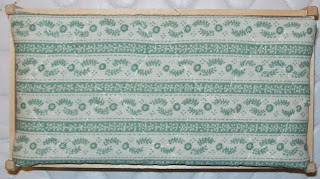
And here's the mattress in place on the bed.
This works fine with regular fabric but I really like the look of it using the quilted fabric. I think that the quilted top gives it a more authentic mattress look. You can 'just' see the 'quilt' stitching on the top of the mattress.
You could even carry it one step further and glue a row of Bunka around the edge of the quilted section to look like the cording around the top edge of most mattresses.
Whew! Three and a half tutorials in one weekend. Think I'm going to take a break for a couple days. LOL
As usual, if you have questions, please let me know and I'll try to clarify. This is available in a .pdf file if you like.


I really like the content of this blog. Nice concepts you have added in this blog. i am just loving it.
ReplyDeleteOnline Beds and Mattresses shop