Size: When it comes to RL beds, even modern "standard" sizes (although the same in Canada and the U.S.) vary somewhat from continent to continent and even, indeed, from country to country. Wikipedia has a wonderful chart of bed sizes. There's an interesting article dispelling the myth that beds used to be smaller because people were shorter.
Miniature Beds: A big problem (pun intended) with miniature beds that are made to scale is that the rooms, particularly bedrooms, tend to be much smaller in most kit-built dollhouses than most modern rooms. For example, the two upper rooms in my Greenleaf "Arthur" are 10" x 10 3/8" (including the stairwell) and 10" x 7 1/4" or the equivalent of just over 100 and 70 sq. ft. respectively. In my condo building, the smallest bedrooms range from 110 - 140 sq. ft. and the master bedrooms range from 140 - 200 sq. ft....which makes the bedrooms in the Arthur about half the size of the larger RL bedrooms in my building.
No wonder a to-scale bed tends to overwhelm a room!
Therefore, in my opinion, a bed is definitely one piece of furniture where the size can be 'fudged' somewhat and still look right in a room. Certainly not so much that the bed looks out of scale with the rest of the bedroom furniture but a double bed that is 1/2" shorter and narrower than its RL counterpart will usually fit the room better and still look 'right' both on its own and in comparison to the rest of the furniture.
This is a scale single/twin bed (RL mattress 39" x 75") made from a HOM kit.

This is the bed I made last night with a slightly smaller mattress (RL 36" x 72").

Okay, okay, on with the tutorial VBG


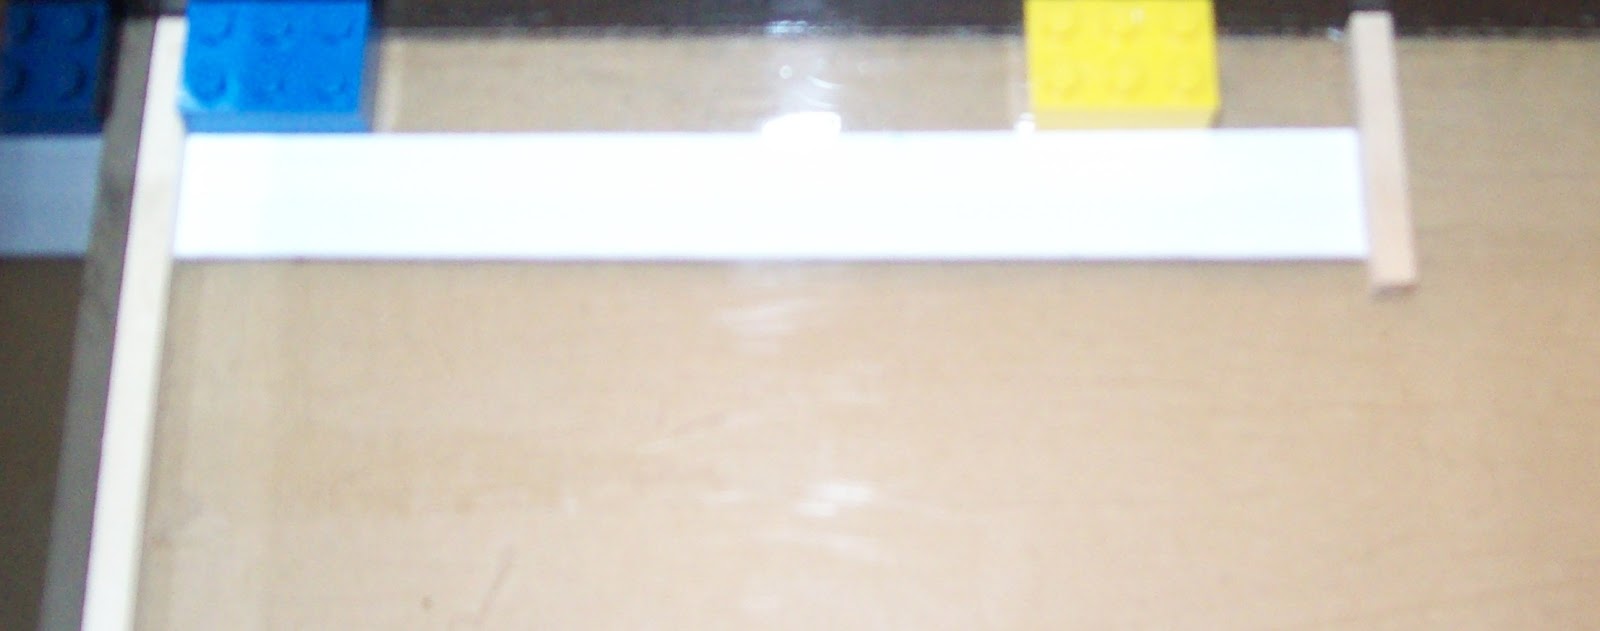
Put glue on both ends of the end rails, using the Lego blocks to keep them even with the side rails. Make sure they line up with the ends of the first side rail to the inside of the leg. Then attach the second side rail, again lining up the ends with the side rail on the inside of the leg.

It should look like this from the top with, in this case, the inner measurement being 3" x 6". (This is still upside down).

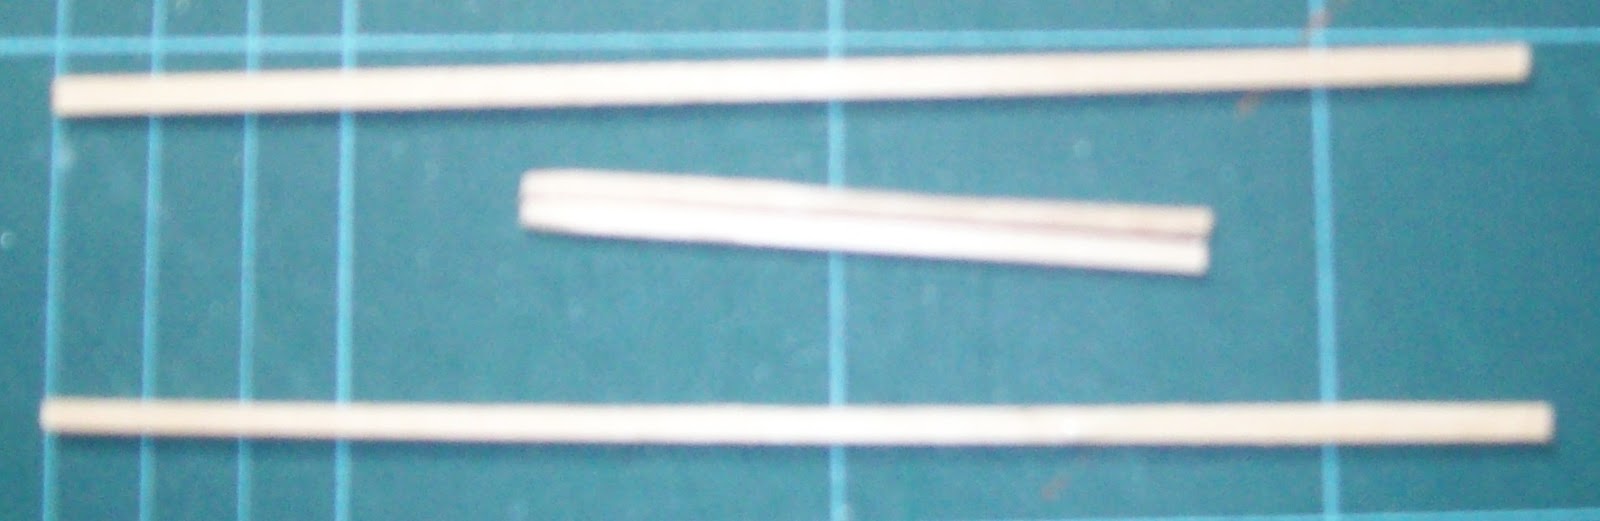
From a sheet of 1/8" basswood, cut a 1/8" strip of wood 17 1/2" long. Then cut that into two 6" lengths and two 2 3/4" lengths. These pieces will form the rail which will support your mattress:
Turn the bed frame right side up (with the bed rails near the top). Glue the two 6" lengths of wood to the inside bottom of each of the side rails then glue the shorter pieces in the same position on the end rails.

Cut a 3" x 6" piece of mat board and slip it in place against the rails.


At this point, I chose to round off the tops of the legs and the outer corner of the legs using an emery board. If you wanted to get a bit fancier, you could glue a round wooden bead to the top of the legs.

A variation:
If you wanted a headboard, you would simply lengthen the leg pieces on one end of the bed and make that end railing proportionately higher. Because you'd have the longer leg, you would have to reverse the way you set the pieces in the gluing jig. (When I made it with the equal length legs, I put the top of the bed sides to the wall of the gluing jig.)
With different length legs, you have to put the bottom of the legs against that wall. Like this:
As always, if you find a step confusing, please let me know and I'll try to clarify it. A .pdf file of this tutorial is available by e-mailing me.
Once I had the bed done, I thought there was no sense leaving it without a mattress so that, of course, leads to yet another tutorial...which I will try to get written and posted later today.
No comments:
Post a Comment