Thursday, February 28, 2013

GO, Team Canada! Junior Men's World Curling Championships!

Well, so far, Team Canada (from Manitoba with Matt Dunstone, grand-nephew as skip) has won two of twelve games in Sochi, Russia! There's an 11 hour time difference so some of the games are at 3 a.m. and I won't be up to "watch" them. But several others are at 8 a.m. and 10 p.m. so will follow many of them . When the guys played in the Canadian finals in Fort McMurray, all we could follow was the end by end results but what we're getting from Sochi are the pictures (through Sweden Thank You) of the house after each rock is thrown so it's hard not to keep watching for the results of each shot....whereas in Fort McMurray I could set a timer and go back to the computer every 10-odd minutes to get the result for that end.

I know that Matt's Mom, Wendi, and his Dad, Dean, and  both sets of grandparents, (as well as all the extended family) would have loved to be in Russia cheering the team on but it just was not possible! There was no way family members could get visas that quickly. (Which I think is really sad - and just a very political thing.)

So I guess I have to move my current projects nearer to my computer so I can keep working on them AND follow the team.


Wednesday, February 27, 2013

Camp Mini Ha Ha 2013

Well, the waiting is over. The registration forms and this year's project are online.


Camp Mini Ha Ha 2013
September 25th - 30th Cornwallis, Nova Scotia, Canada
Camp Mini Ha Ha is an annual miniaturist retreat, held since 2001. The camp is a cooperative event, bringing together miniaturists at every level of experience, from beginner to expert to teacher, and is designed to promote sharing while learning and having a whole lot of fun. Our teachers come from near and far, and campers from all over the world are welcome. Plus no cooking and cleaning!
Camp Mini Ha Ha is a community – everyone is involved and everyone helps out in making Camp the wonderful experience it has become.
Camp takes place every year in September at the Annapolis Basin Conference Center in Cornwallis, Nova Scotia. The Conference Centre provides a peaceful environment in which to escape from the "everyday" and totally immerse yourself in miniatures. The accommodations are semi-private suites which include private sleeping quarters and a shared bath with one other camper.  Camp Mini Ha Ha offers a unique experience different from miniature events typically held
Camp Mini Ha Ha is structured around a single workshop, which begins bright and early Thursday morning and continues through the next four days allowing campers to work, laugh and learn together. In addition to your main project, there are usually some smaller projects to do as well.
In addition to the workshop, there are gifts galore and workspaces available 24 hours a day to accommodate night owls and early birds.
The arrivals begin early Wednesday afternoon and Camp activities begin after supper. Goodbyes are before lunch on Monday. L Details to follow once you are registered.

T
he contribution per camper covers the costs of the project basic materials and five night’s accommodation as well as breakfast, lunch and supper from Thursday morning to Sunday evening.

Monday, February 25, 2013

Shingles for the attic

Love it when a plan comes together....

Except sometimes it doesn't...sort of...

I had decided to roof the attic with black sandpaper shingles as I did the roof for the Serendipity Shop.

Just to double check the size of my shingles, I googled asphalt shingles and found this diagram about a third of the way down. The first picture is of three tab asphalt shingles (that I used on the Serendipity Shop) and the second is of hexagonal asphalt shingles that I decided to use here.

I copied, cropped and sized the image of the hexagonal shingles and used that to cut strips of shingles from 120 grit black sandpaper from Canadian Tire.

The beauty of using the hexagonal pattern is that you can cut it 'back to back' and don't have to use as many cuts. Plus it's a very pretty roof design.

I cut the sandpaper in strips 1 3/4" wide then traced the shingle pattern on the back.


Then used my dedicated sandpaper cutting scissors to cut that strip into two rows of shingles. Then I took a second strip and marked it from the opposite end so the grooves were alternated...

So the alternate rows formed the hexagonal shingles...like this:

Starting to look REALLY good, isn't it?!?

BUT...the strips are only 11" long and my roof is just a fraction under 12" wide so I'm going to have to piece it together......

I can do it but it's going to be a PITA...

What a shame that something so good looking and simple could present such a difficulty.

Yeah, but it'll all come together in the end.

I hope....

Friday, February 22, 2013

Princess Auto

Joanne and I took a 'road trip' today to Princess Auto as she had seen a heat gun in their flyer for $10 (half price). First thing we spotted was a display of ratcheting bar clamps on special. Unfortunately, they only had two twelve inch ones left - and both were broken- but they had a pretty good supply left of six inch clamps so we each picked up two for only $2.99 each.


Joanne also got her heat gun - and we picked up a few other things. I love wandering around Princess Auto and haven't done it for a very long time.

There's a liquidation store just down the block and we checked it out also. Picked up a few things but nothing for minis.

Had a late  lunch at Swiss Chalet and looked over the workshops being offered at NAME National in Tucson in July. (Joanne and a few other MEE members are attending.)

Wednesday, February 20, 2013

Insulating the attic

In her prototype of the attic room that is this year's MEE project, Tina used strips of padded envelopes as insulation. Great look!


But for personal reasons, due to the nature of my attic, I wanted pink insulation. All along, I thought that I would use some type of batting for it. All I had in my stash was some really dense, thinner, cotton/polyester    blend (I think) batting.

A while back, in The Camp, DM made a comment about dying hair with Kool Aid. That twigged the idea that I might dye that batting with Kool Aid.

So I picked up a package of unsweetened strawberry Kool Aid and mixed it half a bowl of water (about 2 quarts). [This is the largest of four Pyrex nesting bowls that Vern and I received as a wedding gift 41 years ago. Still have all four of them - and use them regularly.]


Then I soaked strips of the batting in the mixture.

The batting was so dense and water-resistant that I used a saucepan lid (from before we were married) to gather up the fabric and force it under the Kool Aid mixture.

Then I held the lid down with a  piece of  laminate flooring that Vern collected on one of his "walk-abouts" or I should probably say "scooter-abouts". He thought I might be able to use it at some point - and I have used it many times over the years. It seems particularly appropriate that I use it for a project I'm making in his memory.

 It took about four hours total to dye each piece of the batting - changing the position of the batting in the bowl every hour or so. Then I would spread the batting over the back of a cookie sheet covered with plastic grocery bags.


I ended up with four great pieces of 'pink' insulation. Even though the picture above doesn't look that great, this is really looking good!

BUT :-( it isn't thick enough...even doubling it, it isn't thick enough...

Checked my stash again and found a piece of white batting that was thick enough to put behind the 'now' pink piece for a perfect depth but again :( didn't have enough.

So went to Quiltessentials, the quilting store just down the street...Had to go there anyway to get new blades for my rotary cutter.

Incredible customer service! Ingrid's son found me exactly what I needed! And didn't blink an eye when I told him that I wasn't a quilter but that I was a miniaturist who needed the batting for insulation for an attic!!

[Just FYI, I took along the cutting table, spools of thread, and fabric bolts that I had made for the quilt shop. He was really impressed with the cutting table and fabric bolts so I promised I would bring the quilt shop over when it's completed. But I should note that he didn't see those until after the 'above and beyond' service.]

Here I've taken a top layer of the dyed batting over a layer of the undyed batting and placed it between the first stud on the right hand wall.


It's just a start but I am really pleased with how it's looking.

Tuesday, February 19, 2013

MEE meeting tonight

Some Show and Tell:

Wendy brought in the table she had made at our workshop last week. And Pat brought in three tables she had made from the tutorial.

Pat is one of our newer club members so it was great to see what she did with the tutorial.

Natasha is another of our newer club members. In a very short time, she is doing incredible work with Fimo - particularly her wonderful baking. (We stand in line hoping to grab her discards VBG as her worst is WAY better than anything I can do!) You can follow her work on her blog or on Facebook.

She's been making a lot of new things besides baking lately including these wonderful men's and ladies' folded shirts that she gifted me with tonight.

I actually have been working on the attic over the past few days and hopefully I'll have progress to show you tomorrow (along with some giggles over my method for this particular new step).

Thursday, February 14, 2013

Whiling away time....

The last two days I've put in two five-hour stretches acting as a hostess to two open houses to familiarize condo residents with our guest suite and social room (where we hold our Mini Day Outs). Since I don't have a laptop, this gave me some wonderful time for catching up on things away from the computer!

Yesterday, I took along a jewellery box kit from Dragonfly International that I had bought on our trip to Phoenix last year. I know better but I had opened the kit and kept it loose (should have put it in a ziploc) and when I went to assemble it, I had lost a piece. So I'm still looking for that piece....

But I had a book along that I needed to finish and return to Joanne, so I spent the time reading that. It's "My Ideal Bookshelf" edited by Thessaly La Force with art by Jane Mount. One Hundred people (artists, writers, etc.) were asked to share the books that matter  to them most. Made me do a lot of thinking about what MY ideal bookshelf would contain.

That took care of yesterday's shift quite handily.

Today I had a couple boxes of paperwork that needed to be sorted through and dealt with. As with all things I keep putting off, it didn't take very long to deal with once I got down to it so after that I had time to get some great mini work done.

Our last MEE workshop was making miniature Tiffany-style lamp shades from Shrinky Dink plastic. At our January meeting, we bought the Shrinky Dink sheets and instruction kits that included a choice of eight mandela designs for the lamp shades. We were to trace and colour the designs before the workshop so heat guns and a variety of items could be used to shape the shrunken plastic into lamp shades.

I didn't have my plastic coloured and then I forgot my camera so can't begin to show you the process and the beautiful pieces that resulted.

Tonight I did at least get one piece of Shrinky Dinks coloured and ready to shrink and shape into a Tiffany-style lamp shade.


I kept it very simple in the two shades of green because I hope to use it in the bedroom (another UFO) and because I'm not good with colours.

I would LOVE to do one (not necessarily this design) that is in shades of reds, oranges, corals and pinks as sort of a brilliant sunset but that will be an effort for another day.

After I got that coloured, I still had another hour to kill so I spent the time working on a batch of 15 "St. Albert" books to take as gifts for fellow miniaturists in Chicago. The pages were already cut out so it was just a matter of folding, gluing and clamping them.


Hopefully, tomorrow I will get the covers and spines on this set.

I want to have about 100 of these ready for Chicago so if I can get this many done every week or so, I'll be okay. (I already have about 10 completed.)

Wednesday, February 13, 2013

Table workshop

A week or so ago, I wrote a tutorial for making a table for a "second Tuesday" workshop that I planned to lead. (The "second Tuesday" refers to the fact that our official MEE workshop is on the first Tuesday of the month; our general meeting is on the third Tuesday and Tina hosts a quarter scale workshop on the fourth Tuesday of the month.)

Initially, about 12 people had signed up but for various reasons (illness, other commitments, etc.), only five were able to attend.  So I'll try to schedule an additional workshop to accommodate those who couldn't make it last night.

I had space available for 10 people and could have worked with that but, quite honestly, the five who did attend were such a perfect size group/personalities that I could at least try to give individual attention. (I'm NOT a good instructor to a group but I think I do reasonably well on a one-to-one basis.)

We mostly worked with square food picks and matboard  to get the feeling of making the table.

Here Judi has her table legs and aprons waiting for the glue to dry:

And Dolores waiting for the glue to dry on her legs and apron:

One of the great things about a small workshop is that you can individualize what you do. Because we were working with items 'at hand', Pat and Ruth took four of the square food picks, glued and clamped them together to make more solid table legs then cut them to the length they wanted for their tables.

Pat is applying the glue to the top of her table base:
She also chose to put the apron of the table on the outer side of the legs (as opposed to the inner side as in the tutorial). Her reasoning was that doing it that way hid some of the joints of the four picks in the legs. And that was a great point.Here's Pat's table.

 Wendy also made a great table. She kept with the original size of the prototype but shortened the legs.


Two of the ladies who came last night have limited hand strength and were worried about their ability to cut wood. They were SO pleased when they tried my "Super Easy Cutter" from Midwest Products. It's available in the Edmonton area from Luba or through your local miniature store.


After we got most of the table constructions completed, we stopped for great conversation, coffee, tea, cider, and a wonderful gluten-free chocolate cake that Judi provided..

Pat brought two very large bags of upholstery/drapery samples for us to share.
This is only about 1/4 of one of  the bags that Pat shared with us.

I thought I had shown you my fabric stash before but can't find the pictures of it. Suffice it to say, that it is HUGE and I don't need to add to it:

And I resisted some of the most incredibly beautiful fabric samples: pieces of fabric in almost every possible colour; some suede-type finishes, beautiful polished cotton pieces that looked like leather...

UNTIL: I came across these beautiful sheer pieces of fabric. They are polyester blends so not necessarily the best fabrics for mini use but they are gorgeous and the samples are 26" x 8 1/2| so are a great size!

What I made tonight. This one is a 1:12 model of a  2 1/2' square coffee table on an 18" base made with only mat board and foot picks.


A thought: If you keep those dimensions and make the table legs 2", you will have (NOT) a coffee table but (YES) a child's table!

Monday, February 11, 2013

Making my own furniture and using Lego blocks

Keep in mind, I do not make museum quality furniture....or even great furniture. I make very basic furniture using basswood and simple basic hand tools. This works for me as I prefer modern furniture with very straight lines. I make shelving with butt joints (something you wouldn't  use in real life because it's too weak but  does work in miniature).

Although I do and have done a lot of roomboxes with purchased pieces and/or kits, my greatest pride is in the scenes in which I make all or most of the pieces from scratch. (Not all of the pictures are available on my Fotki site due to the delay in recovering pictures in storage after Hurricane Sandy.) Some of my particular favourites are Gerry's office (my very first copy of a room), Dennis's office, the camping scene, the Leo Nickerson art room, Marie's mini display,  and the penthouse.

Oh, my, I had forgotten the bar in the two-story roombox. As much as I love the detective's office on the second floor, the pieces in the bar on the ground floor are my pride and joy. The detective's office only took about a month to finish but I got totally stalled on making the actual bar for the bar room on the main floor. Got most done for it early June 2011 including the booth, cigarette machine and dart board. It wasn't until August 2012 that the bar itself finally came together in my head so I could make it and I could declare the scene finished.

One of my special tools is a small bag of Lego blocks! I have a small bag of various sizes that work for most things.  They are wonderful for spacing pieces of wood at even intervals.

In the last couple tutorials, you've seen how handy Lego blocks can be as spacers in many different ways.

If I'm building shelving using butt joints Lego blocks make wonderful spacers to keep shelves level and equidistant.


If you don't have a gluing jig to keep angles straight, you can make one from Lego blocks (and build it as high or as long as you choose/need.

The beauty of using the Lego blocks is that once glue has dried on whatever you are gluing, it just slips off the blocks.(And any glue that might stick to the blocks can be peeled off.)

"Back in the day", Lego kits came with a lot of basic pieces. Now they are SO fancy that they don't generally include a lot of the basic bricks that you will want for your construction. BUT there are LOTS of other sources for the basic pieces shown above.

Because the newer kits are so specific theme oriented, your younger grandchildren may not be the best source of the pieces you will want. The best/least expensive sources will probably be thrift stores or garage sales. E-bay or Kijiji may be a great source. Search either using the words "Lego blocks". On e-bay.com I found several sellers offering up to 200 basic pieces for under $10 (didn't check shipping though).

LEGO itself has an online store that offers a shopping basket where you can order your choice of 196 diffferent Lego bricks. (Unfortunately that shopping basket link doesn't lead to the shortest and quickest choice - once you get there, click on Brick Search categories on the left hand side and that will lead you to 196 choices of the most basic pieces of Lego - and those are the ones you want.) Prices run from 10 to 30 cents per piece (and I don't know what shipping would be) so it's not cheap but you could find specific pieces (including a right angle piece I didn't know existed) .

My first choice would to be  (hopefully) find a bag of pieces at a garage sale or on kijiji.

Sunday, February 10, 2013

Mattress for the bed

 After I made the bed, I decided that there was no sense leaving it without a mattress.

I used:

soft foam (I didn't have 1/2" thick so I used two thinner pieces - see below)
the mat board piece from the bed
foam glue
straight edge
utility knife
scissors
fabric (see below)
Weldbond glue

Most miniature bed mattresses are made from 1/2" foam. The few pieces I had of 1/2" thick were not large enough. I had several thick kitchen sponges which I could have used in a pinch but (1) they would have had to be cut to the right thickness, then pieced to the right length. (You can, and I have, cut these with a serrated knife such as a bread knife or an electric knife but I always have a problem getting a good straight even cut.)

But I did have lots of thinner foam (about 1/4 - 3/8" thick). One of the advantages of a thinner foam is that you can get a fairly straight edge cut with a good pair of scissors.

To begin, I removed the piece of mat board from the bed and trimmed it (on one side and end only) by 1/8" to allow for fabric wrapping around the edge.

Then I used a very fine black marker (a microtip pen) to trace around the mat board on to the foam then cut two matching pieces of foam.


I bought this glue for styrofoam the last time I was in the U.S.

I used it to glue the two foam pieces together and to the mat board.

I had a great piece of quilted fabric in my stash so I laid the mattress on it and cut it about 1" larger all around. (Actually, I just sort of eyeballed it and should have cut it a bit longer so this is a matter of 'do as I say, not as I do'. VBG) If you're not lucky enough to have a similar piece of fabric in your stash, you can use an appropriate piece of unquilted fabric in which case you can skip the instructions to trim the fabric and batting from the sides of the fabric.

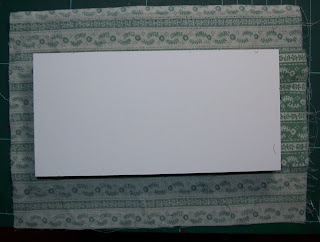
I then used the foam glue to glue the foam side of the mattress to the wrong side of the fabric. When the glue had set, I took a tiny pair of scissors and cut and removed the wrong side fabric and the batting (being careful not to cut through the bottom layer of fabric - the mattress cover). Here three sides of the fabric have been removed, with the layers on the right hand side at the end of the mattress yet to be removed.

And here with all excess layers removed.

Here the single layers of fabric have been wrapped around the sides of the mattress and glued to the matboard with Weldbond.

Then the end pieces are wrapped around the ends of the mattress (like wrapping a gift) and the ends glued to the matboard.


Here's the bottom of the mattress with the ends of the fabric glued in place. (Because I had cut the fabric a bit short there wasn't a great deal of fabric to wrap around and glue to the left hand end. So there I used a strip of adhesive tape to hold the fabric in place until the glue dried.

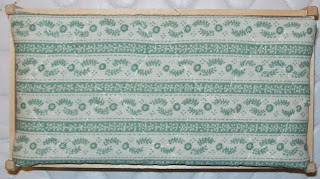
And here's the mattress in place on the bed.

This works fine with regular fabric but I really like the look of it using the quilted fabric. I think that the quilted top gives it a more authentic mattress look. You can 'just' see the 'quilt' stitching on the top of the  mattress.


You could even carry it one step further and glue a row of Bunka around the edge of the quilted section to look like the cording around the top edge of most mattresses.

Whew! Three and a half tutorials in one weekend. Think I'm going to take a break for a couple days. LOL

As usual, if you have questions, please let me know and I'll try to clarify. This is available in a .pdf file if you like.

Bed sizes and tutorial

When Trineke was here last, she was asking about making a bed for the attic room project which she is doing as her teenage bedroom. As I recall, her description was of a very simple bed with no headboard so I hope this is something like what she had in mind.

Size: When it comes to RL beds, even modern "standard" sizes (although the same in Canada and the U.S.) vary somewhat from continent to continent and even, indeed, from country to country. Wikipedia has a wonderful chart of bed sizes. There's an interesting article dispelling the myth that beds used to be smaller because people were shorter.

Miniature Beds: A big problem (pun intended) with miniature beds that are made to scale is that the rooms, particularly bedrooms, tend to be much smaller in most kit-built dollhouses than most modern rooms. For example, the two upper rooms in my Greenleaf "Arthur" are 10" x 10 3/8" (including the stairwell) and 10" x 7 1/4" or the equivalent of just over 100 and 70 sq. ft. respectively. In my condo building, the smallest bedrooms range from 110 - 140 sq. ft. and the master bedrooms range from 140 - 200 sq. ft....which makes the bedrooms in the Arthur about half the size of the larger RL bedrooms in my building.

No wonder a to-scale bed tends to overwhelm a room!

Therefore, in my opinion, a bed is definitely one piece of furniture where the size can be 'fudged' somewhat and still look right in a room.  Certainly not so much that the bed looks out of scale with the rest of the bedroom furniture but a double bed that is 1/2" shorter and narrower than its RL counterpart will usually fit the room better and still look 'right' both on its own and in comparison to the rest of the furniture.

This is a scale single/twin bed (RL mattress 39" x 75") made from a HOM kit.


This is the bed I made last night with a slightly smaller mattress (RL 36" x 72").
To my eye, it still looks in scale but frees up just a bit more floor space. (Somehow the lack of a headboard makes it look smaller too although the smaller bed is only 1/8" lower at the top of the mattress than the other.)


Okay, okay, on with the tutorial VBG

 I cut two pieces of 1/8" basswood 1/2" x 3" and two pieces 1/2" x 6" long (for a mattress 3" x 6"). Then  I cut four pieces of 3/16" square strip wood 1 1/2" long for the legs.

Using the same technique as for the table base, I made one side of the bed in my gluing jig, only for the bed the rail is spaced down from the top of the leg by 3/16" (the depth of a small Lego block). Both side rails are done in this manner then when the glue has dried, the end rails are put in place.

Put glue on both ends of the end rails, using the Lego blocks to keep them even with the side rails. Make sure they line up with the ends of the first side rail to the inside of the leg. Then attach the second side rail, again lining up the ends with the side rail on the inside of the leg.


It should look like this from the top with, in this case, the inner measurement being 3" x 6". (This is still upside down).

From a sheet of 1/8" basswood, cut a 1/8" strip of wood 17 1/2" long. Then cut that into two 6" lengths and two 2 3/4" lengths. These pieces will form the rail which will support your mattress:


Turn the bed frame right side up (with the bed rails near the top). Glue the two 6" lengths of wood to the inside bottom of each of the side rails then glue the shorter pieces in the same position on the end rails.

Cut a 3" x 6" piece of mat board and slip it in place against  the rails.


At this point, I chose to round off the tops of the legs and the outer corner of the legs using an emery board. If you wanted to get a bit fancier, you could glue a round wooden bead to the top of the legs.

A variation:
If you wanted a headboard, you would simply lengthen the leg pieces on one end of the bed and make that end railing proportionately higher. Because you'd have the longer leg, you would have to reverse the way you set the pieces in the gluing jig. (When I made it with the equal length legs, I put the top of the bed sides to the wall of the gluing jig.)

With different length legs, you have to put the bottom of the legs against that wall. Like this:

I hope this makes sense. I just thought about this aspect when I decided to mention that you could add a headboard if you choose.

As always, if you find a step confusing, please let me know and I'll try to clarify it. A .pdf file of this tutorial is available by e-mailing me.

Once I had the bed done, I thought there was no sense leaving it without a mattress so that, of course, leads to yet another tutorial...which I will try to get written and posted later today.