Thursday, April 19, 2012

Odds and Ends

Went to club meeting on Tuesday night.

Unfortunately forgot my camera so don't have any pictures of the incredible hot dog/hamburger stand that Carol K. is making for the "Little Fair on the Prairie" display at the September show and sale. It's from a Joann Swanson project and it's just SO perfect!

Barb S. was selling some snack plates and some wonderful laser cut pieces. Got four of the laser cut pieces for my Christmas shop (Yes, it does exist and, yes, I will get back to working on it one of these days) and two snack plates for my picnic table at the Fair.


I know that Sunni taught us how to do this ourselves last workshop but I'd much rather buy than try to make food. LOL

And here's the little doll with a doll that I won as a door prize. (Made by my friend Judy Mitchell.)

Joanne had brought in some duplicate Nutshell News to sell. Didn't have my  list with me but took a chance on three - of course, I already had two of them. Oh, well...

Still in the process of reading the one that is new to me but have already come across one tip that I think will come in handy.

TIP: On areas that are difficult to reach with a paint brush, try painting with a Q-tip bent so it will curve into those spaces.

and another use for Q-tips from DD Leanne.

TIP: If you have a wall-hung sink and want to show the drain pipe, the plastic stick from a Q-tip will work. You can heat the plastic in a pot of boiling water then shape it OR you can straighten a paper clip and run it through the centre to keep the plastic from kinking too badly when you shape it. (If it does kink you can generally reshape it with a pinch from your needle nose pliers.) Paint silver or black, glue to the bottom of the sink and the wall and there you have it!


Monday, April 16, 2012

Something new...sort of...

Remember when I made those books about the City of St. Albert to pass along on our trip to Phoenix?

Barb's daughter works for the City of St. Albert so I took two of the books and made her a pair of ear-rings!


Sunday, April 15, 2012

MIA

Sorry I haven't been around lately but have had a major case of the blahs and not doing much of anything but read.

On the bright side, I have spent most of the morning watching about 30 robins fly around outside the building.


Monday, April 9, 2012

Some tutorials

Have been doing some major reading to avoid catching up on my RL paperwork but finally started tackling it yesterday. Got a good portion of the sorting and shredding done yesterday but figure it'll take a couple more days to finish it off properly. Then we have our first Show and Sale committee meeting Wednesday night and will start contacting prospective dealers after that. So it could be a while before I will get back to working on my miniatures.

In the meantime, a few days ago I received an e-letter from Cotton Ridge Designs and they have a new tutorial up. They have 12 tutorials on their website. The latest is a flower arranging table and contains instructions for making some flowers and some aging tips. Even if you're not particularly interested in making the actual vignettes, the tutorials are full of great ideas and worth a look.

Thursday, April 5, 2012

Just wait five minutes....

I think that probably just about anywhere in the world the local saying is "if you don't like the weather, just wait five minutes and it'll change". That's certainly true of Alberta - especially in the spring.

When I went to bed five hours ago (got reading, of course), the ground was dry and clear.


Since I don't have to be out in it, it's actually sort of pretty with huge snowflakes falling! Forecast is for 1-3 cm of snow from Thursday morning to Friday morning.

Wednesday, April 4, 2012

Food for a Picnic

Last night at our MEE workshop, Sunni taught a polymer clay class on picnic foods. She's a great teacher and even brought in a couple RL hot dogs as a visual aid...and gave each member attending canes for radishes, carrots and cucumber.

My contribution was a small ziploc bag of tossed salad for each attendee. It's really easy to make but it's easiest to make in large quantities. (This makes about 15 - 20 2" x 2" full ziploc bags which, in turn, will fill 2 - 4 salad bowls.)

Supplies:
artificial snow flakes (keep this in mind at the $ store in November/December)
3 shades of green acrylic paint
3 4" x 6" ziploc bags
a sheet of dryer fabric softener (like Bounce)
waxpaper

HINT: Being plastic, the artificial snow flakes are FULL of static electricity and fly all over the place and stick to everything!!! BUT if you take a handful of them from the original bag using a sheet of dryer fabric softener, they are much more easily controlled.

Put a handful of the snow flakes in each of the ziploc bags.


Add a couple squirts of green acrylic paint to a bag of snow. (I think I used about 1/2 teaspoon.) Then smoosh (a technical term, of course VBG) the snow and paint together until the snow is covered.

One down, two to go...

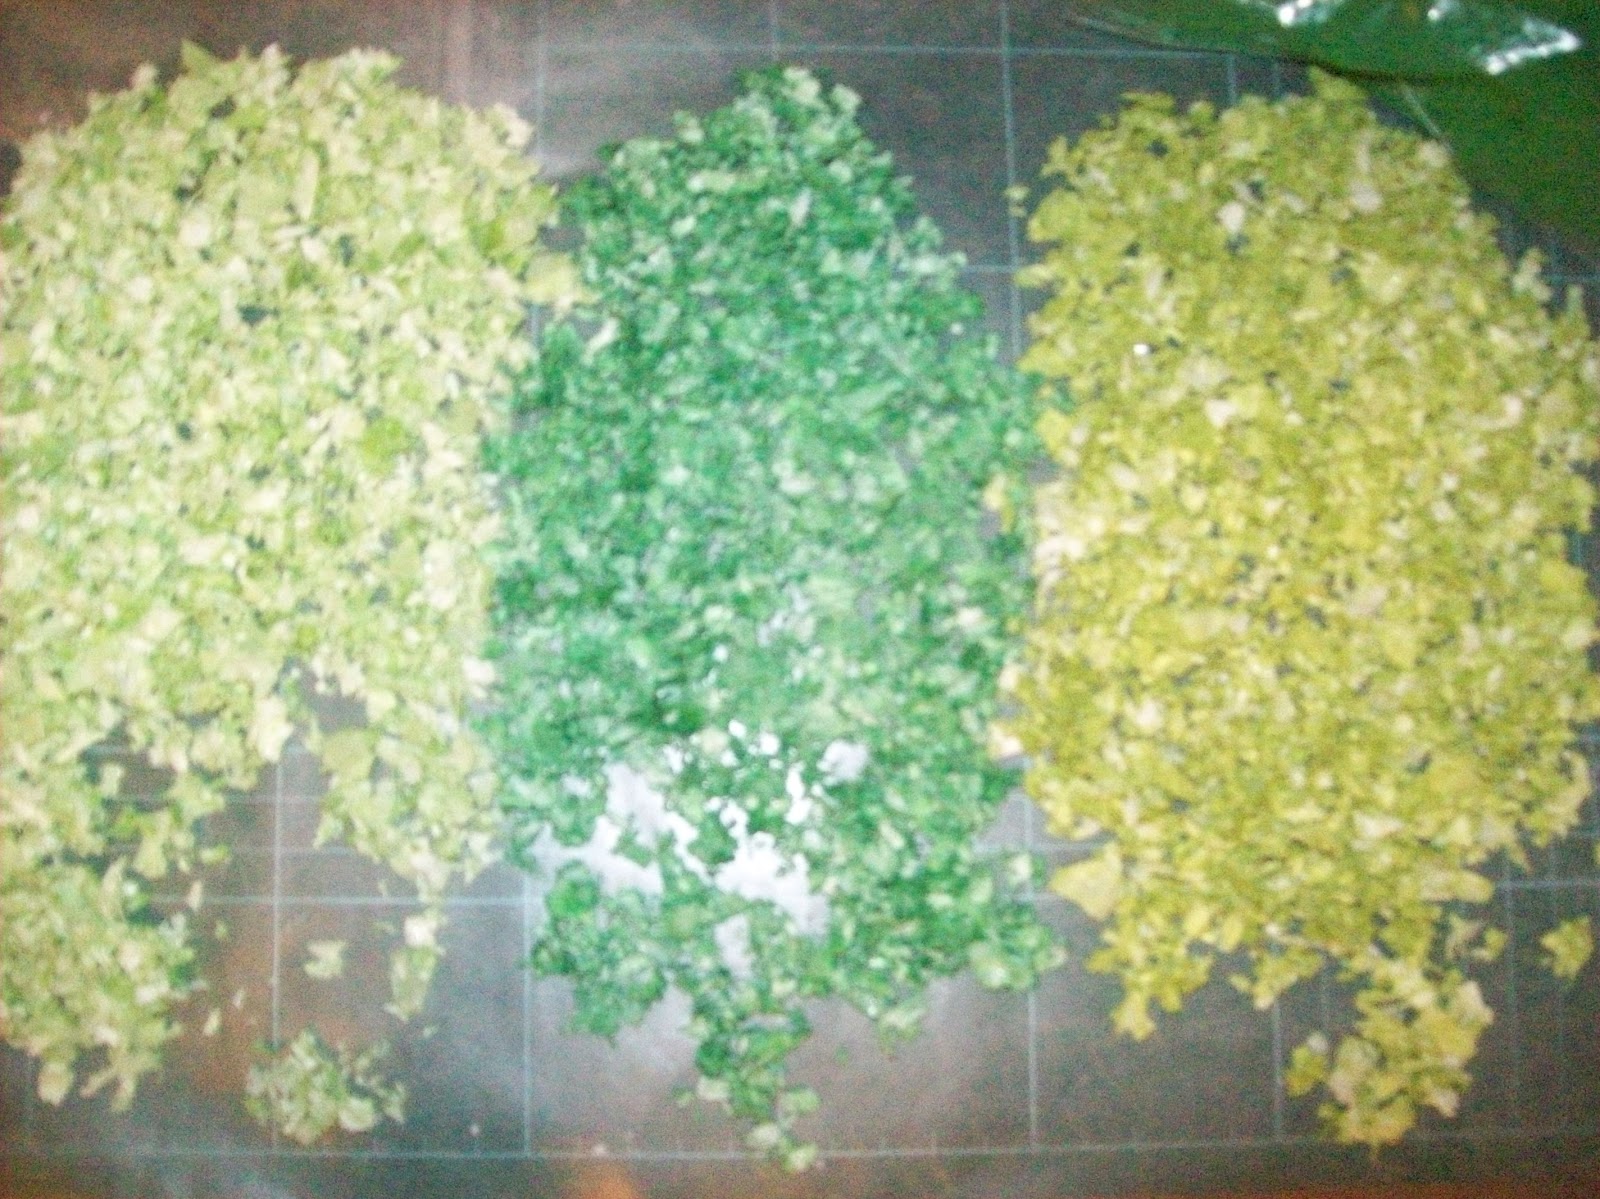
 These particular bags were done with Americana  Hauser Light Green, Americana Leaf Green and DecoArt Leaf Green, simply because they were three green acrylic paints that I had . You can use whatever you have on hand. And you don't really need to use three separate colours...I just happened to have three that worked. I've also done it with just one green for smaller quantities.
 Once the snow and paint are mixed well, they're spread on waxed paper to allow the paint to dry.
 Then they're all mixed together for a good variety of colour....


Put some salad greens in a bowl, and add snippets of red fun foam for bits of tomato, or red peppercorns for cherry tomatoes. Cut the ends off two turned toothpicks (stained brown or painted silver) and stick in for serving utensils.


This particular salad bowl is made from the cap of a Montclair water bottle. On the right are two that were painted on the inside with Gallery glass and trimmed with Pilot gold pen. My friend Judi had some buttons that were incredible salad bowls.

There are three pages of instructions for picnic food by the late great Mary Eccher on her Pannikins website http://pannikins.homestead.com/backyard_barbecue.html

Also Sue Giordano's instructions for a backyard bbq are in American Miniaturist July/Aug 2003 page 27...and her instructions for fimo watermelon are on page 21 of the July 2004 issue of AM.

Believe me - I've even made the watermelon!!! and I'm simply hopeless with fimo!

There are instructions for a nice little picnic basket from Miniature Collector
http://scottpublications.com/mcmag/kc/kc_jun10.pdf

Odds and Ends:
My friend Judi e-mailed me with some questions she had about her picnic so I'm adding my reply here...maybe there are some tips that you can use.

Sure can’t think of anything else for your salad, unless you like a bit of tomato – and you could use a bit of chopped red fun foam for that. (The trick to working with fun  foam is to rub both the foam and your cutting blade with a fabric softener sheet.) Just checked on  the late, great Mary Eccher’s website (pannikins.com) and she suggests a tiny bit of yellow acrylic paint mixed with Elmer’s white glue (think you could use Tacky) for a mayonnaise dressing.


I haven’t tried it but think if you wanted to dress your tossed salad, you could use a bit of slightly watered down Tacky glue and mix it in with your salad. Should give a bit of a gloss representing the oil from the dressing (from the glue) and will hold your salad in the bowl.


For drinks: If you don’t have resin/catalyst water as suggested by Mary, you can use glass stain or Tacky glue tinted with a bit of acrylic paint. Both those shrink a fair bit when they dry so you’ll have to keep topping them up until your glass is full and level – takes time but cheap and worth the wait. For glasses, the caps from Tacky glue bottles work well. Mary suggested toothbrush bristles for straws but you could also use pieces from the tags that are attached to clothes, etc.

Since you’re talking about printing plates and a tablecloth, assume you found those at http://printmini.com/printables/p1.shtml And if you did, I’m sure you saw his picnic cooler. It’s a great piece and would work well here.

Simply because Laurie H. asked me about them this morning, I’m thinking you could add a bowl of potato chips. Easy-peasy! Next time you cut up a sweet pepper, save the seeds and dry them – Voila! Instant potato chips…and if you prefer BBQ chips, try sprinkling them with a bit of paprika.

Sunday, April 1, 2012

more faucets, Jo-Ann's pottery

I got thinking about the faucet and while it's fine as is for a bathroom faucet, it's not quite right for a kitchen faucet.

My original thought was to add a metal earring back to it:
but that's too big and heavy for a kitchen faucet. Would work well as a shower head though. (And, of course, they're always good as salt and pepper shakers.)

So then I thought of the plastic earring backs that I use as Christmas tree decorations.


I couldn't find an unpainted one in my stash so had to use a red one to demonstrate (but that's okay as it shows up better anyway - or so I tell myself).


The other day I mentioned Jo-Ann Shaw's wonderful miniature pottery and the fact that members of her club in Nova Scotia met a lady in Holland at the Arnhem Show who had just bought some of Jo-Ann's pottery. I'm pleased to announce that Jo-Ann now has a website for her miniatures! In addition to her pottery, Jo-Ann also makes leather saddles in 1:12 scale. Lovely lady and great, detailed work!

Faucet and taps

Laurie had made some great sinks for her washroom trailer from a plastic paint palette. I didn't see exactly what she used but she ended up with a row of sinks in a white counter so I think she must have used one like this:

We came up with taps and a faucet made from some head pins, silver beads and two bugle beads.

The ones I made to show you are built on a piece of wood and would be glued in  place later. (The ones for Laurie's sinks could be built straight into the counter.)


For this you need:
1" piece of coffee stir stick
3  one inch head pins
3 silver beads
2 clear or white bugle beads
emery board
pin vise drill
silver pen
Tacky glue
needle nose pliers
wire cutters

Cut a 1" piece of wood from a coffee stir stick. Across the middle of the wood, drill three holes: at the 1/4", 1/2" and 3/4" points.


Using the emery board, round the top edges of the wood, then colour it silver.

Feed the head pins through the three holes from the bottom so the heads of the pins are on the bottom of the wood. Run a small strip of tape across the bottom to hold the pins in place. From the top, add a silver bead to each pin. Glue each silver bead to the wood.


About 1/16" above the outside silver beads, bend the outside pins at right angles.
Using a round shape such as a pen or pencil, shape the top end of the middle pin into a faucet.

Put a small amount of glue on the outside pins near the right angles. Slip a bugle bead over each of the pins and slide the bead down to the right angle. Then, using the wire cutters, clip off the end of the pins extending past the bugle beads.


When you're ready to install this, remove the tape from the bottom of the wood and glue it to the counter top behind your sink. (If you're careful and keep the glue away from the pin heads, your tap handles will turn and the faucet will swivel.)