Anything to delay cleaning and doing paperwork...
I taped down the kitchen and living/dining room floors and started work on the staircase.
I had a piece of white swirly matboard that I wanted to 'paper' the back wall of the living/dining room with. As I took the measurements for the back wall, I discovered it wasn't quite square so I made a template from paper to make sure I cut the matboard to the size needed. Then it was taped in place.
Finally decided to do a solid wall up the side of the staircase. First, I covered the bottom of the staircase with a piece of the matboard.
The ends of the matboard need to be bevelled to match the angle of the stair ends.
This is the piece of matboard that will go up the side of the stairs. If I glue it directly to the stairs, it adds just a fraction too much width to the stairs so it doesn't quite fit in the stairwell. So I traced along the edge of the stairs and pulled off some of the layers of matboard.
Here the matboard is glued to the edge of the stairs.
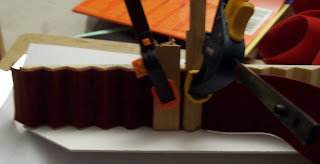
I have a beautiful white stair runner with a border in my stash but unfortunately it's too wide for this set of stairs. But I found a piece of deep burgundy velvet ribbon that would work well. Unfortunately, it has a plastic backing so it's a bit harder to glue in place.
It does glue on but has to be clamped in place for about 10 - 15 minutes so I ended up doing two steps at a time and clamping scraps of wood in place until the glue dries.
At this rate, the runner should be glued in place before I go to bed tonight.
Then tomorrow I'll glue the handrail on and glue the stairs in place.


No comments:
Post a Comment