Showing posts with label salad. Show all posts

Wednesday, April 4, 2012

Food for a Picnic

Last night at our MEE workshop, Sunni taught a polymer clay class on picnic foods. She's a great teacher and even brought in a couple RL hot dogs as a visual aid...and gave each member attending canes for radishes, carrots and cucumber.

My contribution was a small ziploc bag of tossed salad for each attendee. It's really easy to make but it's easiest to make in large quantities. (This makes about 15 - 20 2" x 2" full ziploc bags which, in turn, will fill 2 - 4 salad bowls.)

Supplies:
artificial snow flakes (keep this in mind at the $ store in November/December)
3 shades of green acrylic paint
3 4" x 6" ziploc bags
a sheet of dryer fabric softener (like Bounce)
waxpaper

HINT: Being plastic, the artificial snow flakes are FULL of static electricity and fly all over the place and stick to everything!!! BUT if you take a handful of them from the original bag using a sheet of dryer fabric softener, they are much more easily controlled.

Put a handful of the snow flakes in each of the ziploc bags.


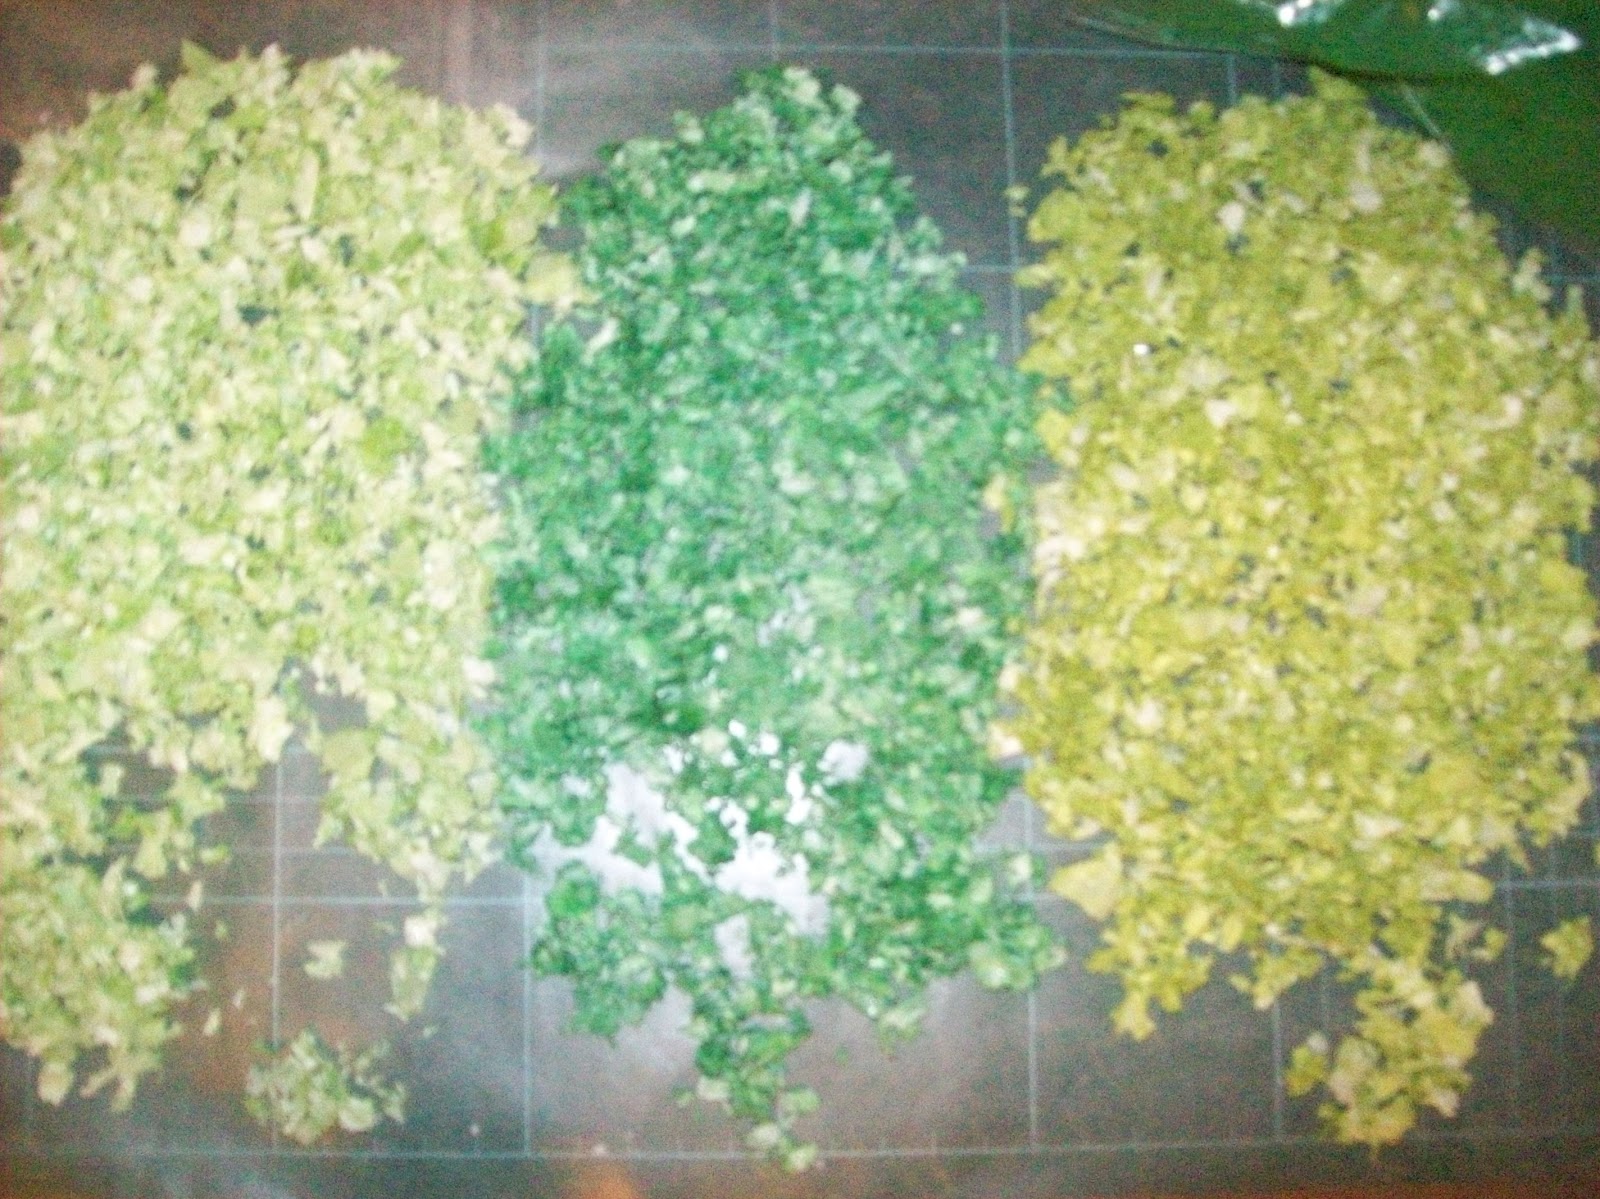
Add a couple squirts of green acrylic paint to a bag of snow. (I think I used about 1/2 teaspoon.) Then smoosh (a technical term, of course VBG) the snow and paint together until the snow is covered.

One down, two to go...

 These particular bags were done with Americana  Hauser Light Green, Americana Leaf Green and DecoArt Leaf Green, simply because they were three green acrylic paints that I had . You can use whatever you have on hand. And you don't really need to use three separate colours...I just happened to have three that worked. I've also done it with just one green for smaller quantities.
 Once the snow and paint are mixed well, they're spread on waxed paper to allow the paint to dry.
 Then they're all mixed together for a good variety of colour....


Put some salad greens in a bowl, and add snippets of red fun foam for bits of tomato, or red peppercorns for cherry tomatoes. Cut the ends off two turned toothpicks (stained brown or painted silver) and stick in for serving utensils.


This particular salad bowl is made from the cap of a Montclair water bottle. On the right are two that were painted on the inside with Gallery glass and trimmed with Pilot gold pen. My friend Judi had some buttons that were incredible salad bowls.

There are three pages of instructions for picnic food by the late great Mary Eccher on her Pannikins website http://pannikins.homestead.com/backyard_barbecue.html

Also Sue Giordano's instructions for a backyard bbq are in American Miniaturist July/Aug 2003 page 27...and her instructions for fimo watermelon are on page 21 of the July 2004 issue of AM.

Believe me - I've even made the watermelon!!! and I'm simply hopeless with fimo!

There are instructions for a nice little picnic basket from Miniature Collector
http://scottpublications.com/mcmag/kc/kc_jun10.pdf

Odds and Ends:
My friend Judi e-mailed me with some questions she had about her picnic so I'm adding my reply here...maybe there are some tips that you can use.

Sure can’t think of anything else for your salad, unless you like a bit of tomato – and you could use a bit of chopped red fun foam for that. (The trick to working with fun  foam is to rub both the foam and your cutting blade with a fabric softener sheet.) Just checked on  the late, great Mary Eccher’s website (pannikins.com) and she suggests a tiny bit of yellow acrylic paint mixed with Elmer’s white glue (think you could use Tacky) for a mayonnaise dressing.


I haven’t tried it but think if you wanted to dress your tossed salad, you could use a bit of slightly watered down Tacky glue and mix it in with your salad. Should give a bit of a gloss representing the oil from the dressing (from the glue) and will hold your salad in the bowl.


For drinks: If you don’t have resin/catalyst water as suggested by Mary, you can use glass stain or Tacky glue tinted with a bit of acrylic paint. Both those shrink a fair bit when they dry so you’ll have to keep topping them up until your glass is full and level – takes time but cheap and worth the wait. For glasses, the caps from Tacky glue bottles work well. Mary suggested toothbrush bristles for straws but you could also use pieces from the tags that are attached to clothes, etc.

Since you’re talking about printing plates and a tablecloth, assume you found those at http://printmini.com/printables/p1.shtml And if you did, I’m sure you saw his picnic cooler. It’s a great piece and would work well here.

Simply because Laurie H. asked me about them this morning, I’m thinking you could add a bowl of potato chips. Easy-peasy! Next time you cut up a sweet pepper, save the seeds and dry them – Voila! Instant potato chips…and if you prefer BBQ chips, try sprinkling them with a bit of paprika.

Saturday, February 25, 2012

Good start on the cleaning/organizing...

I'm not finished but at least got off to a fairly good start. (Made the mistake of picking up a book this morning but used my timer and read for a half hour then worked for a half hour so the day wasn't a complete loss...until my Mom brought over a true crime book about an event in my home town...but I finally managed to put that down and get some more work done.)

As I was sorting through and bagging the items in the shoeboxes I showed you earlier, I came across a bag of canned goods. In that were 2 cans of spray glass cleaner that I had forgotten I had made...one will go on the shelf in the laundry room in the Bombay house.


For those of you who have been following the progress on the Bombay house, it's sort of on the back burner while I work on the dining room area. I'm in the process of  trying something for the dining room table cloth and until that's finished (if it works) I can't put all the dishes, cutlery and food back on the table. Plus the kitchen is a real disappointment since I put the cupboards and appliances back in so that's back in the 'thinking' stage. But I will get back to it.

And of course, I was busy with the scrapbooking vignette. And hope to do our Canada Minis Trash to Treasure Challenge before we leave for Arizona to see the Tucson Miniature Time Museum and attend the Phoenix Show and Sale.

But nothing is going to get done on any of my projects until I get some major cleaning/putting away done!

With that in mind, I sat down with the two shoeboxes of minis that I've purchased/made/took out and haven't put back and sorted through them and have started putting them away properly.


For those of you who don't know me, I store my miniature accessories in ziploc bags on cork bulletin boards that I hang in a closet at the end of my workroom.

As you can see on the second bulletin board from the right, I wire clothes hangers to the bulletin boards.  I have 21 of these boards (I've been a miniaturist for a LONG time) and they are such a great way to keep things organized.

When I first started, I used the parts storage cabinets like these. And they were fine but as my collection increased the separating and labelling got harder and harder. Especially once I started using things from the collections. I had to remember to cross off what I had used from the label and remember to add additions to the label.

Going with the bulletin boards eliminated the specificity.  Now I could go with general categories per bulletin board and specific categories for each board. And if I removed something from the board, it didn't require relabelling.

These four are for food, dishes and pots and pans.

Here's the edge of the first corkboard on the left: Pots/Pans; Baking Pans; Baking; Pantry


These will go on the food boards: salad made from artificial snow, sundae on a pushpin, grape jelly from Lite-Brite peg; wedding cake (Dollarama wedding favour; bag of canned goods made from strips of paper; cake on pushpin stand; salad; potato chips from pepper seeds; cake from cork; bottles of pasta made by my friend Elaine; another sundae on a pushpin; licorice allsorts by Le Gourmand; purchased ice cream sundae; more licorice allsorts bought in Calgary years ago; watermelon made from tutorial in American Miniaturist magazine

Mixing bowls made from food dye containers; knife block with knives made from turned toothpicks (I made both the knives and the block); mixing bowl made from contact lens container: drinking glasses (stained glass paint container lids); Three teapots made from beads and findings (I bought these from Another World Miniatures but you can get the findings from Oriental Trading); great Tupperware bowl miniatures (I got these from a Tupperware dealer selling at the Glenrose Hospital in Edmonton); plate templates (a gift from Tina M., MEE chairman); a bag of Chrysnbon dishes and silverware from the Edmonton Sale and Show; and a wonderful Chinese takeout meal from Ann Vanture.

I've tried to put links to the 'how-to's" or information on these particular pieces but if I've missed anything or you want to know more, please let me know and I'll try to add the info.